

GitHub Setup
Connect your Zuplo project to GitHub for source control and automatic deployments. Every push to your repository deploys automatically — no CI/CD configuration required.
Connect Your Project to GitHub
This guide assumes you have a Zuplo project created. If you don't have one yet, follow the steps in Step 1 - Setup a Basic Gateway to create a new Zuplo project.
-
Connect to GitHub
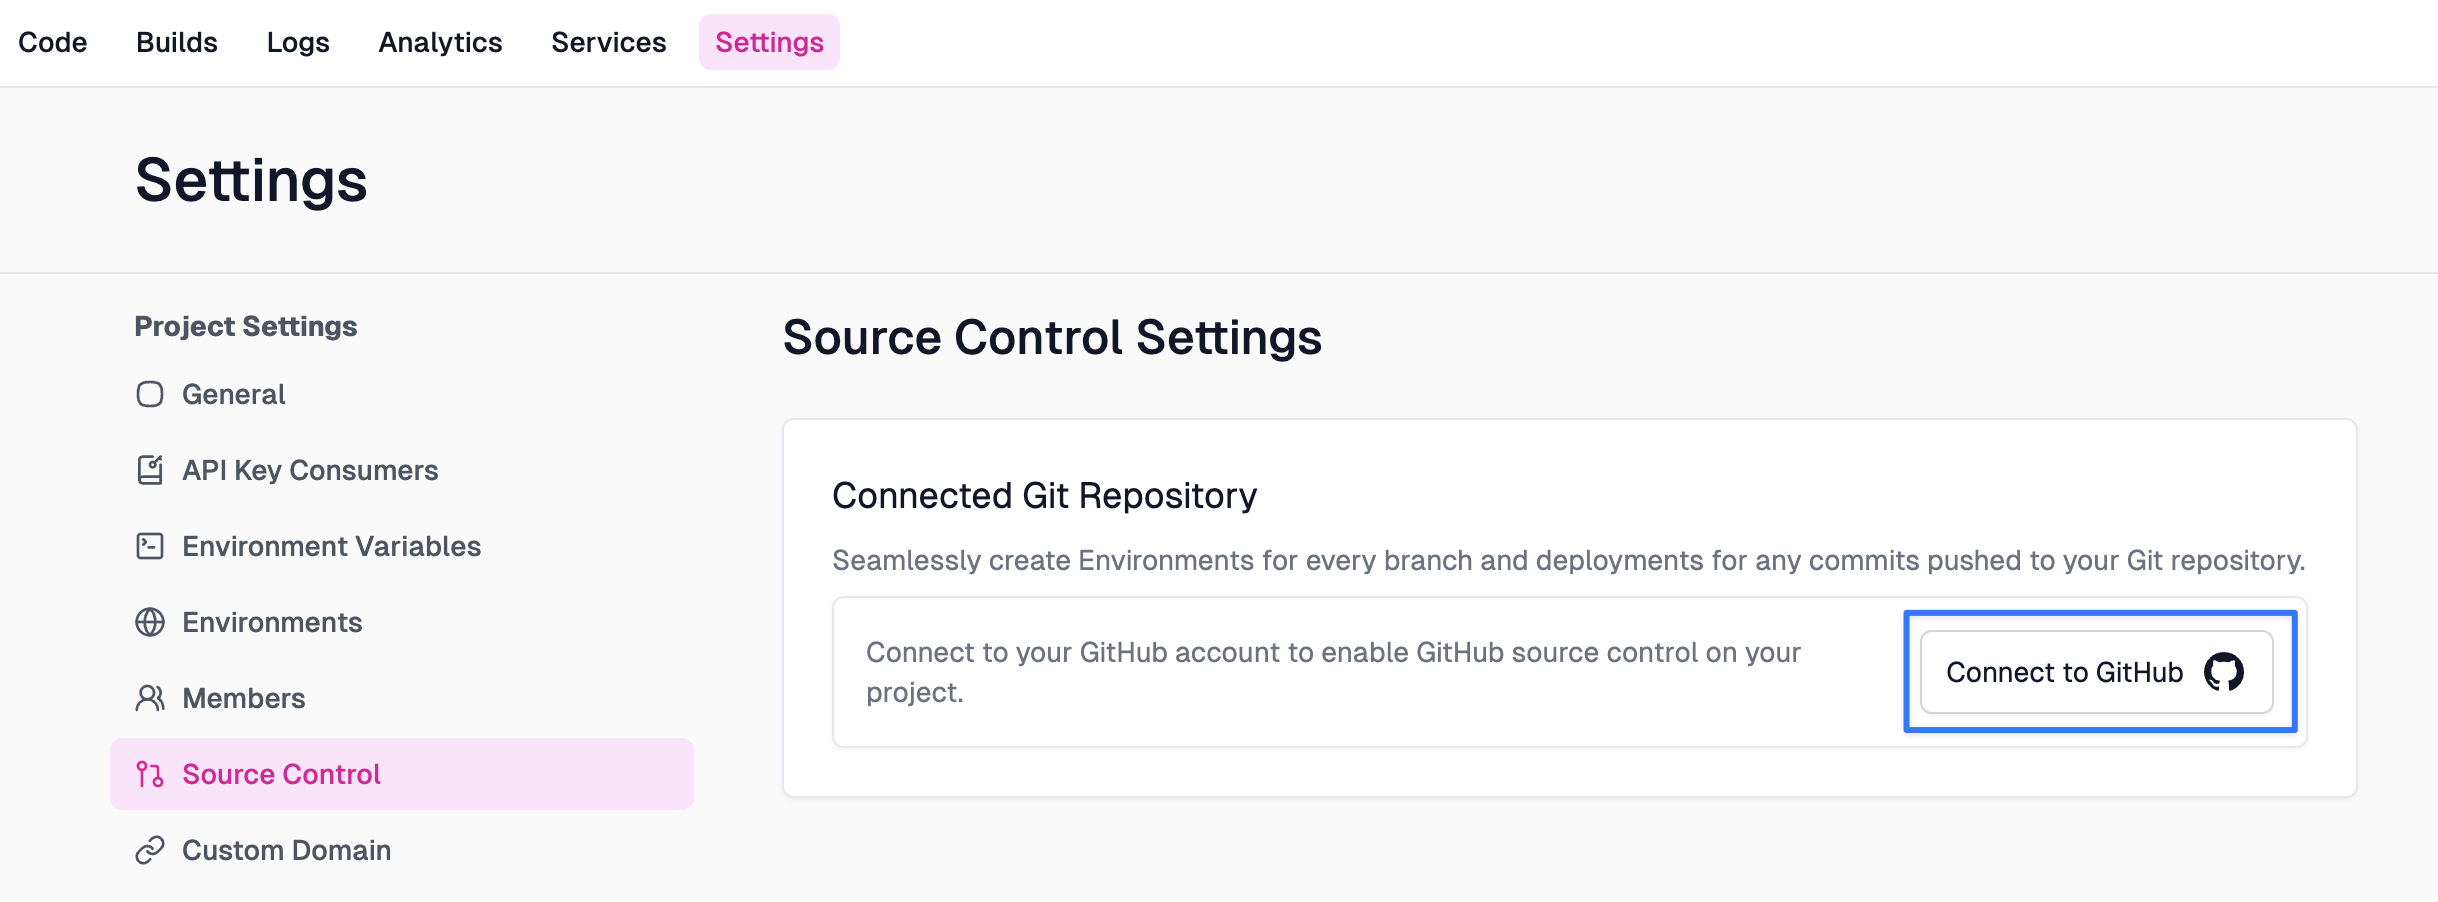
Open your project settings in the Zuplo Portal, then select Source Control. If your project isn't already connected to GitHub click the Connect to GitHub button and follow the auth flow. You'll need to grant permissions for any GitHub organizations you want to work with.
-
Authorize Zuplo
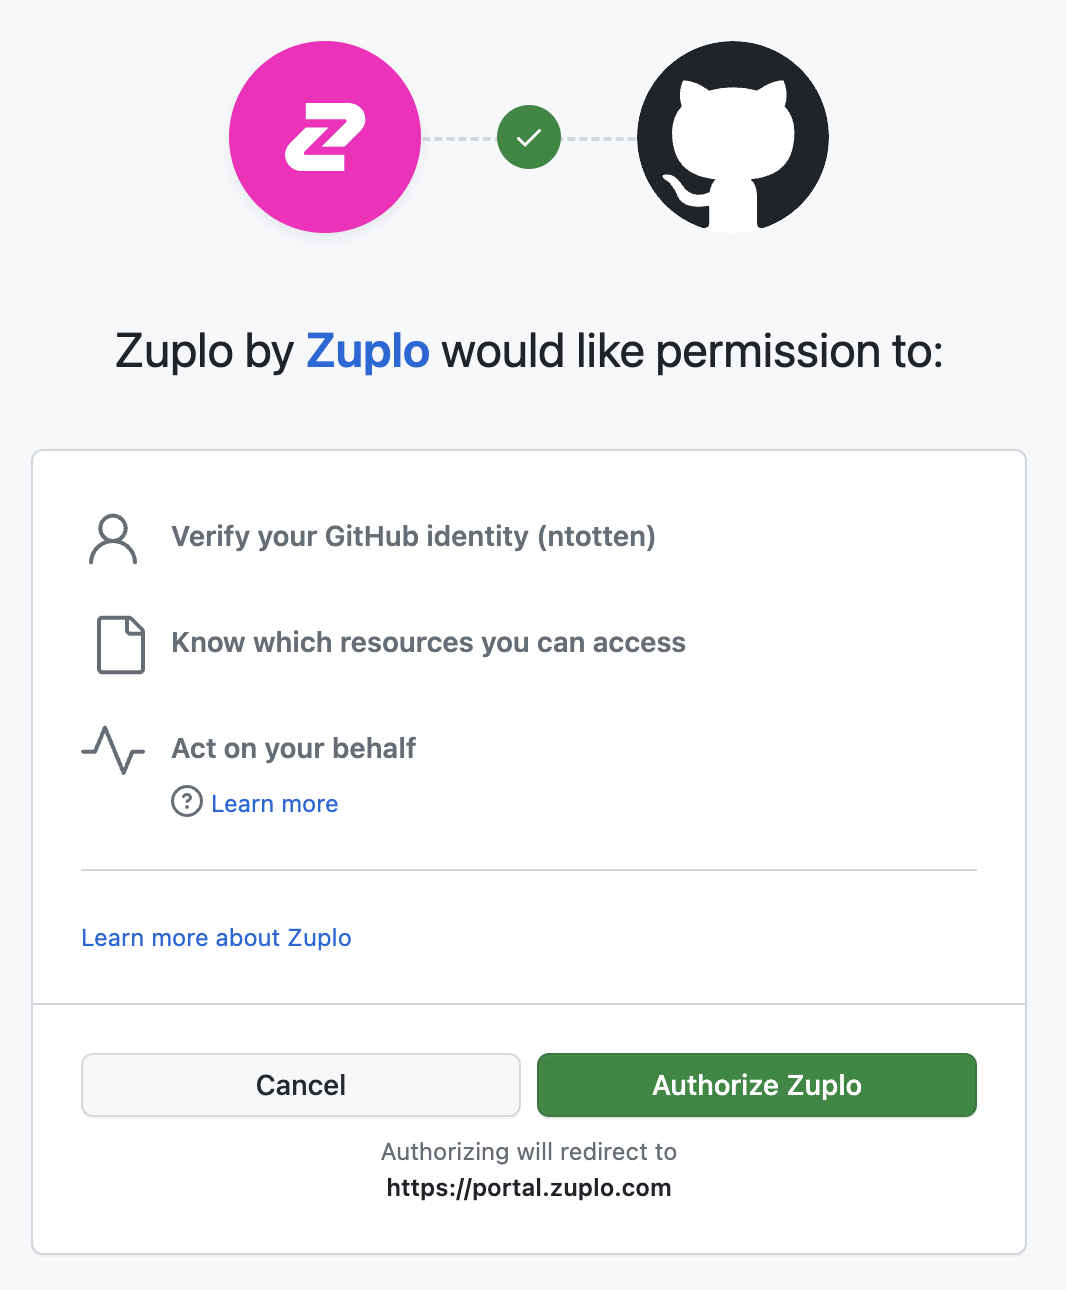
A dialog will open asking you to authorize Zuplo. Click the Authorize Zuplo button.
GitHub Permissions
The permission "Act on your behalf" sounds a bit scary - however, this is a standard GitHub permission and by default Zuplo can't actually do anything with this. In order to perform actions on your behalf you must grant Zuplo access to a specific repository (shown in the next steps).
-
Select a GitHub organization
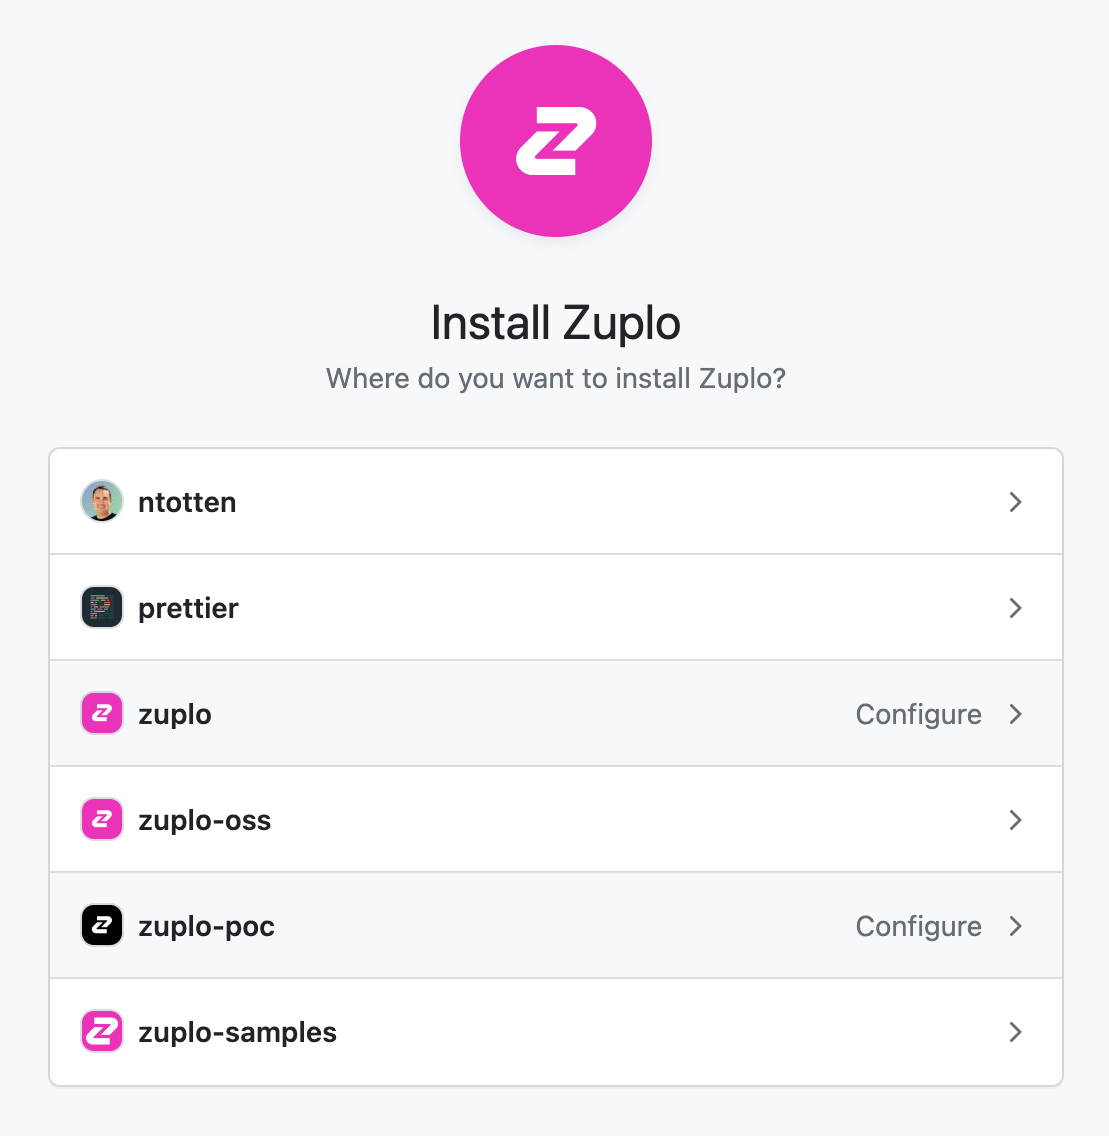
After you have connected the GitHub app, it needs to be granted permission to edit a repository. If this is your first time connecting Zuplo, you will be immediately asked to select a GitHub Org to install Zuplo. Select the org you want to use.
-
Select repositories
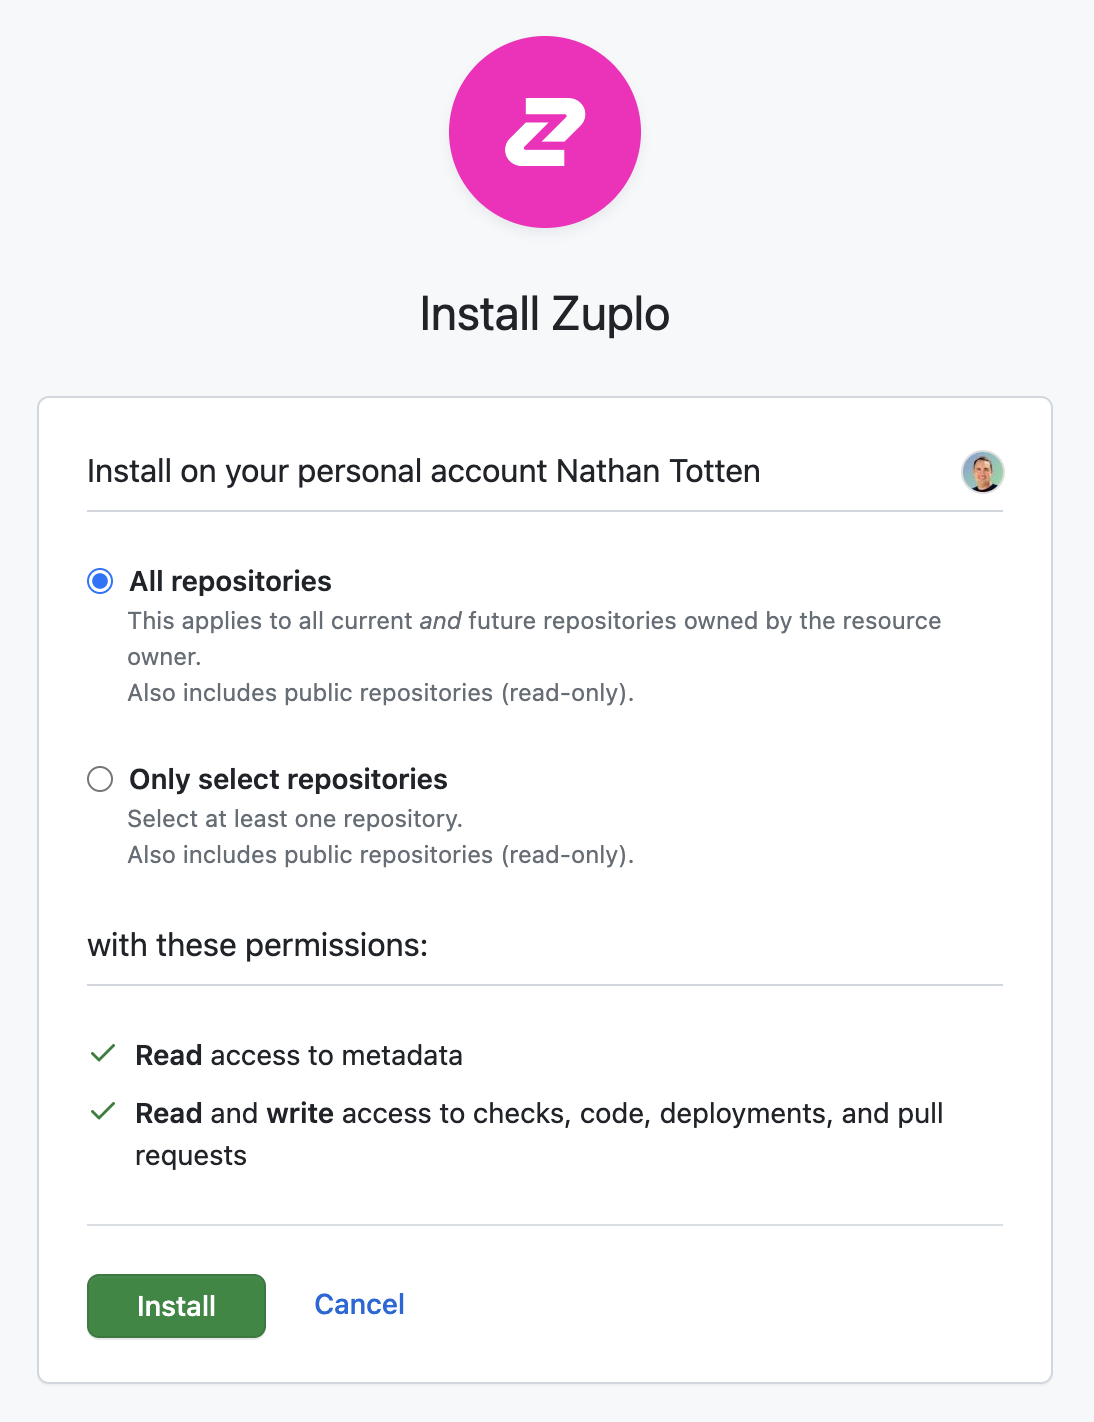
You will be asked to select the repositories that you want Zuplo to access. The easiest thing is to just select All Repositories, but if you want fine-grain control, you can select a specific repository.
Existing Installation
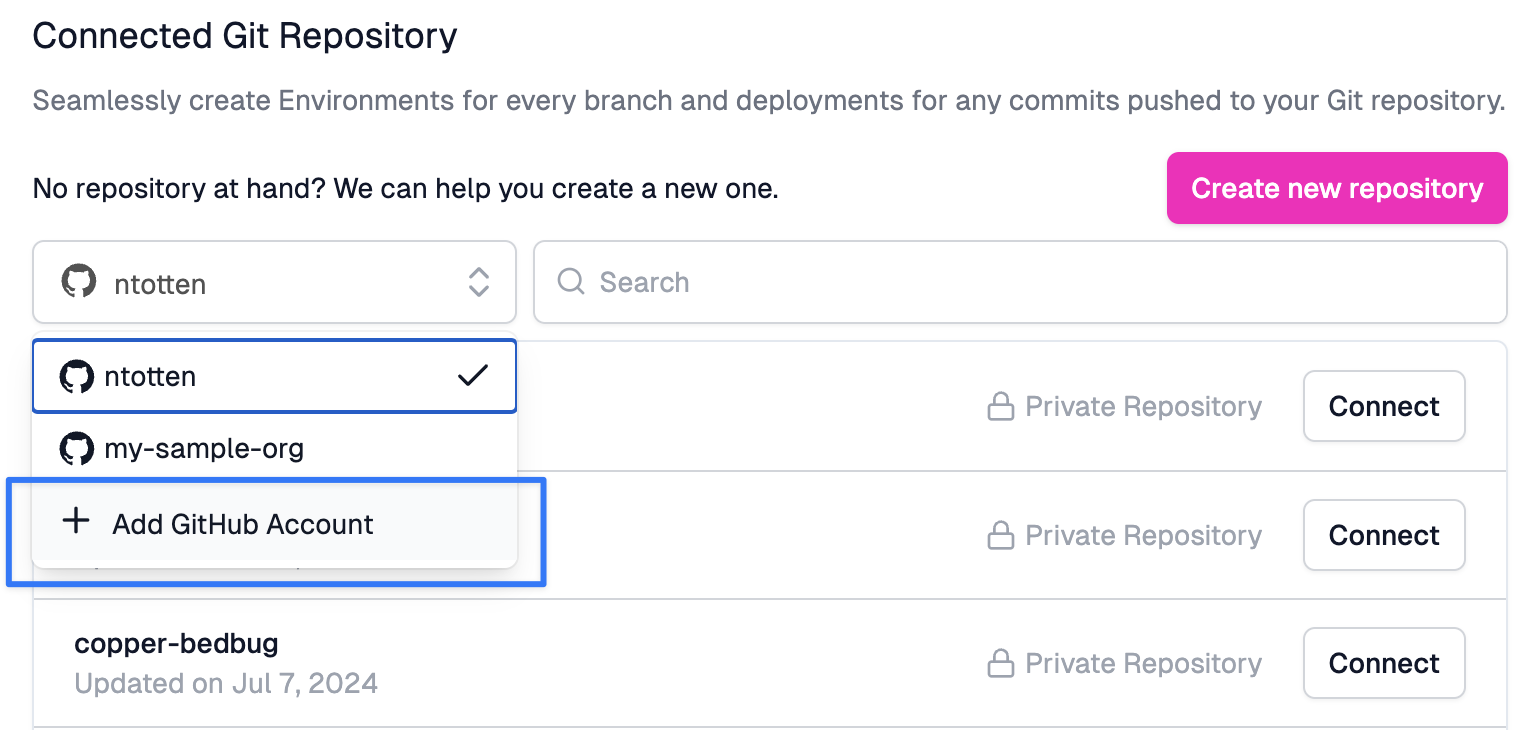
If you weren't prompted to select a GitHub org, it's likely that you are already a member of an account that has authorized Zuplo. To add Zuplo to a new organization click Add GitHub Account in the org picker list.
-
Create a repository
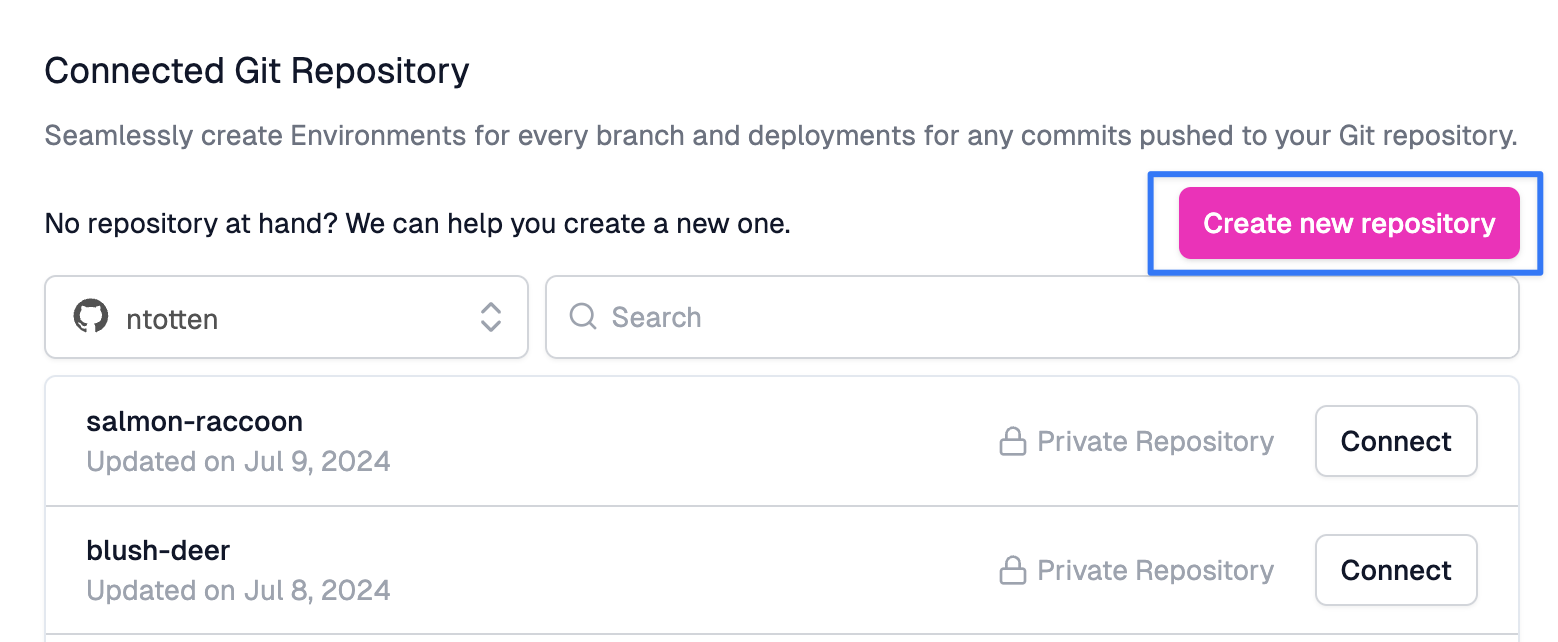
With your GitHub App configured, return to the Zuplo portal. In the Source Control settings you should now see a list of GitHub repositories. Create a new repository by clicking the Create new repository button. You will be prompted that this will open GitHub. Click to continue.
In the GitHub UI, you can rename your repository if you want. Click the Create repository button at the bottom of the page and return to the Zuplo Portal.
-
Connect your repository
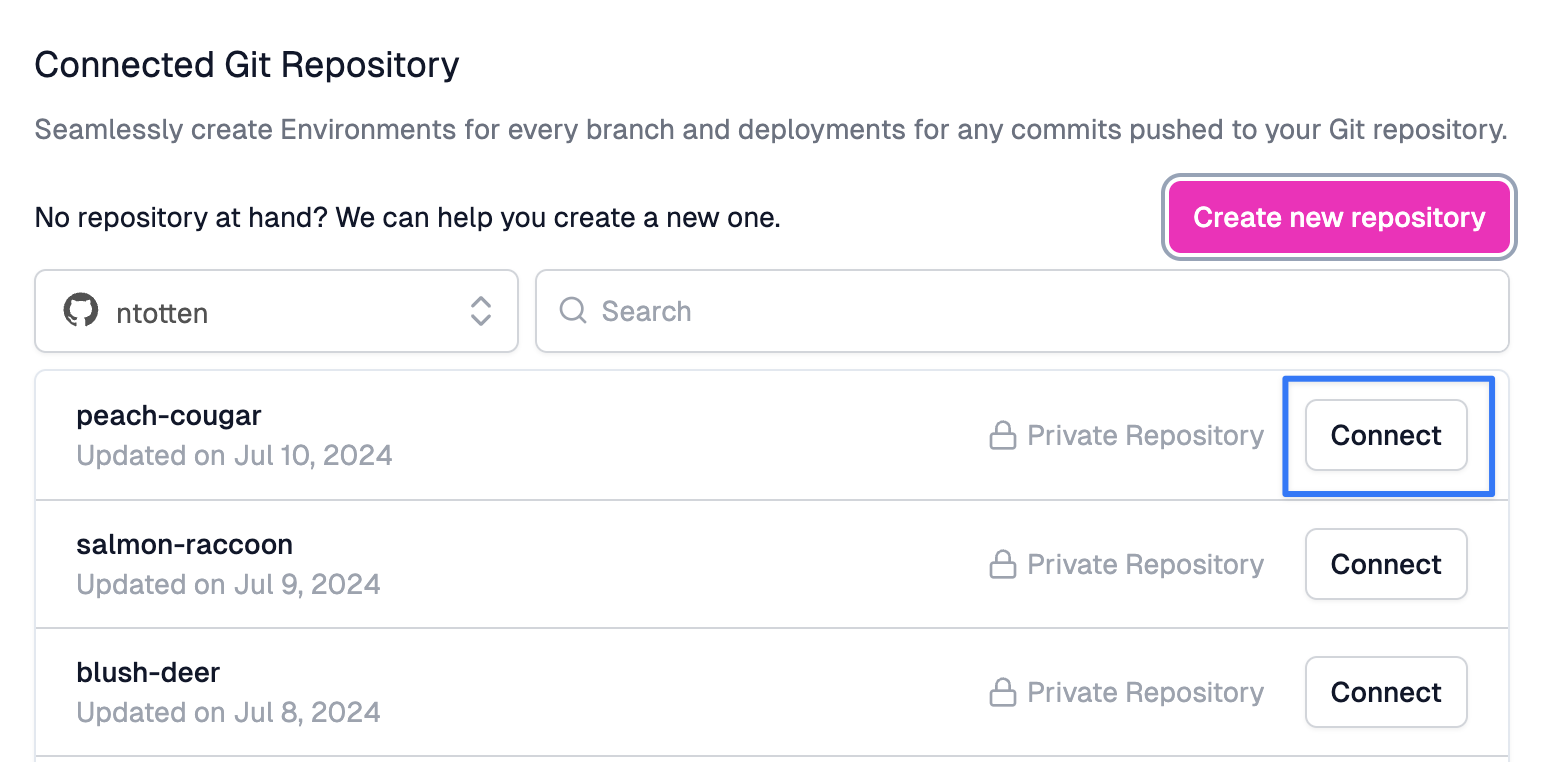
The portal will reload and you will see your new repository listed. Click Connect to connect Zuplo to that repository.
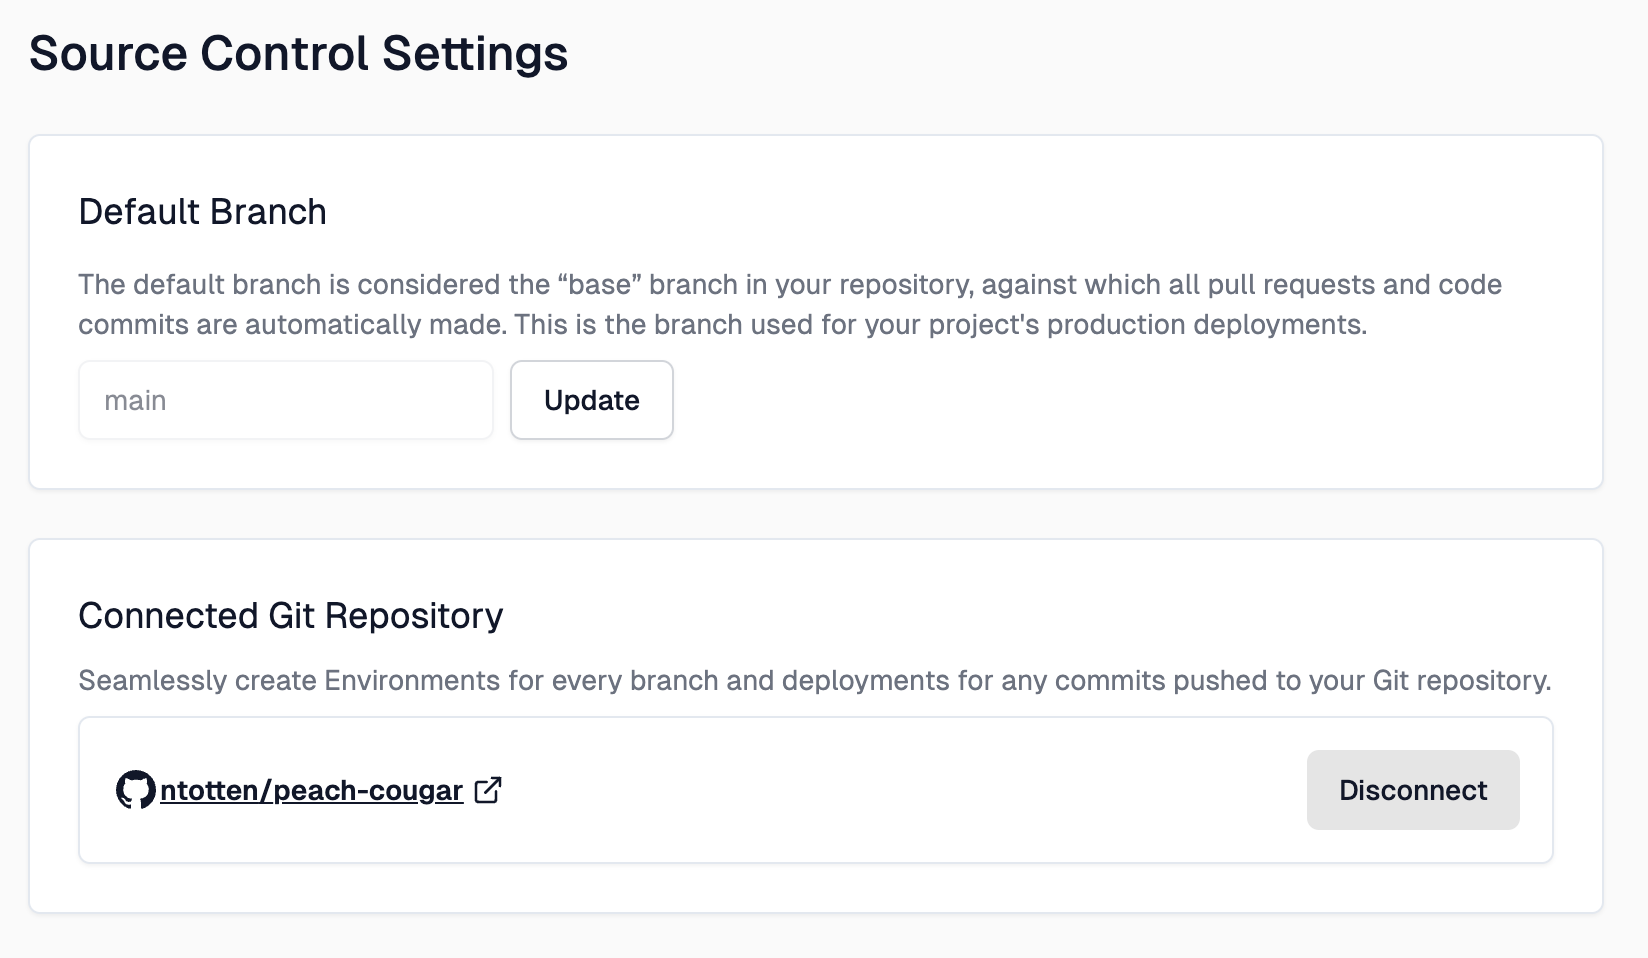
After the connection succeeds you will see a link to your GitHub repository.
-
Verify deployment
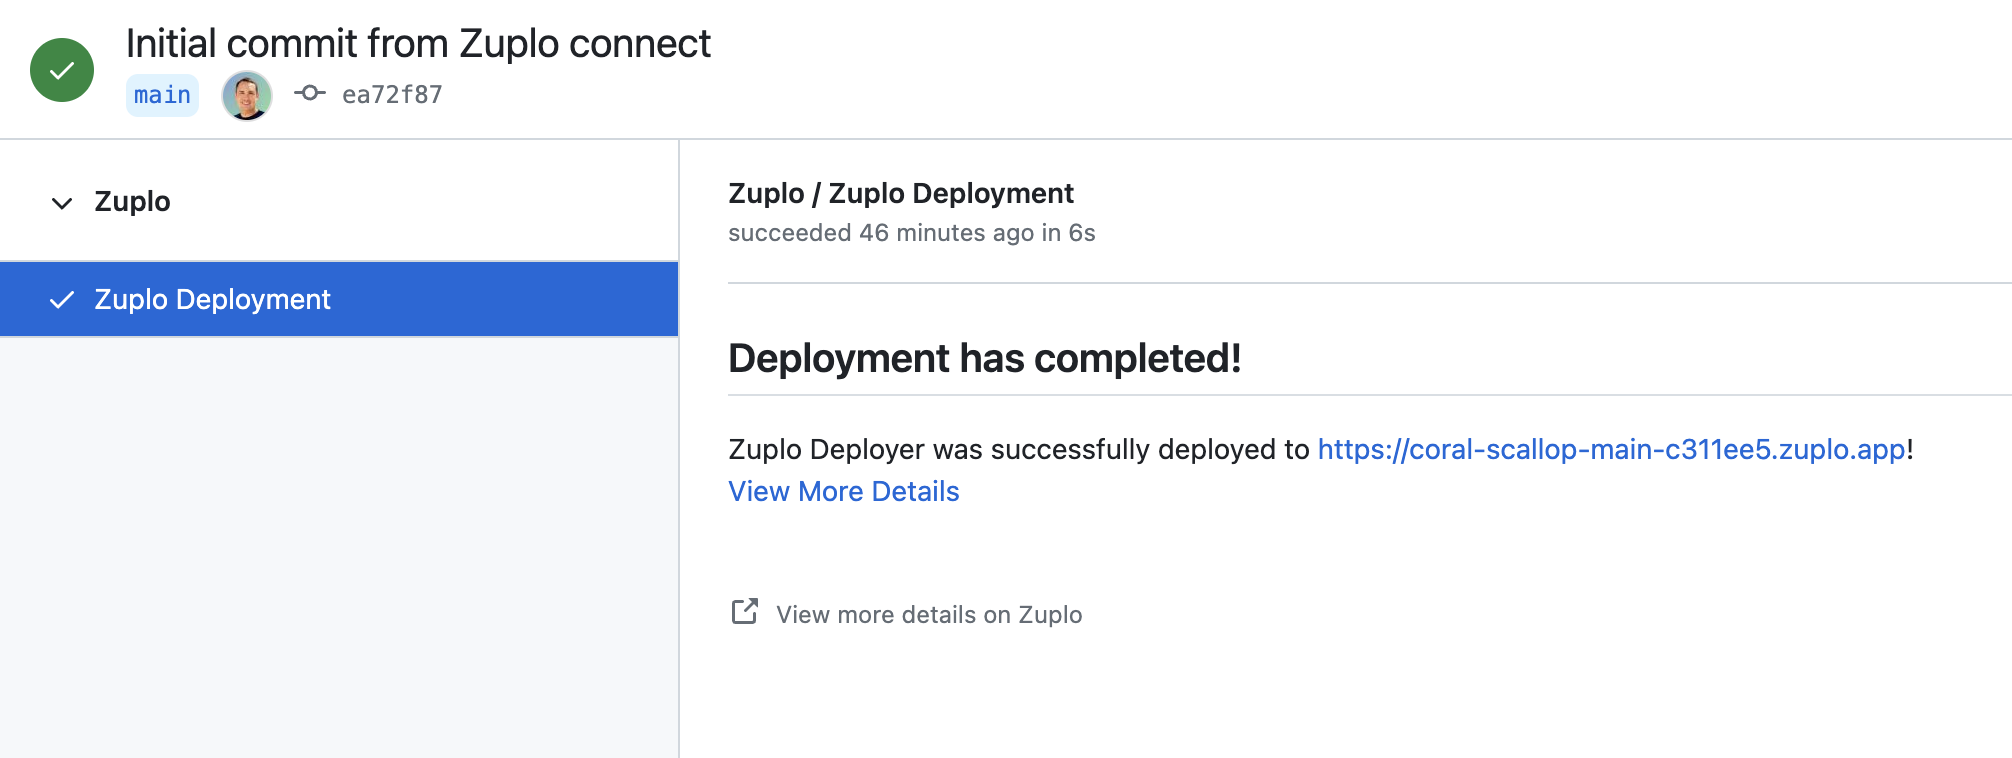
Click the link to return to GitHub. You should see a green check next to the commit hash (1). When you hover your mouse over that you'll see the Zuplo deployment was successful. Click Details (2) to open the deployment info.

On the deployment page, you will see Deployment has Completed!! and below that's the link to your new environment.
Connecting Existing Repositories
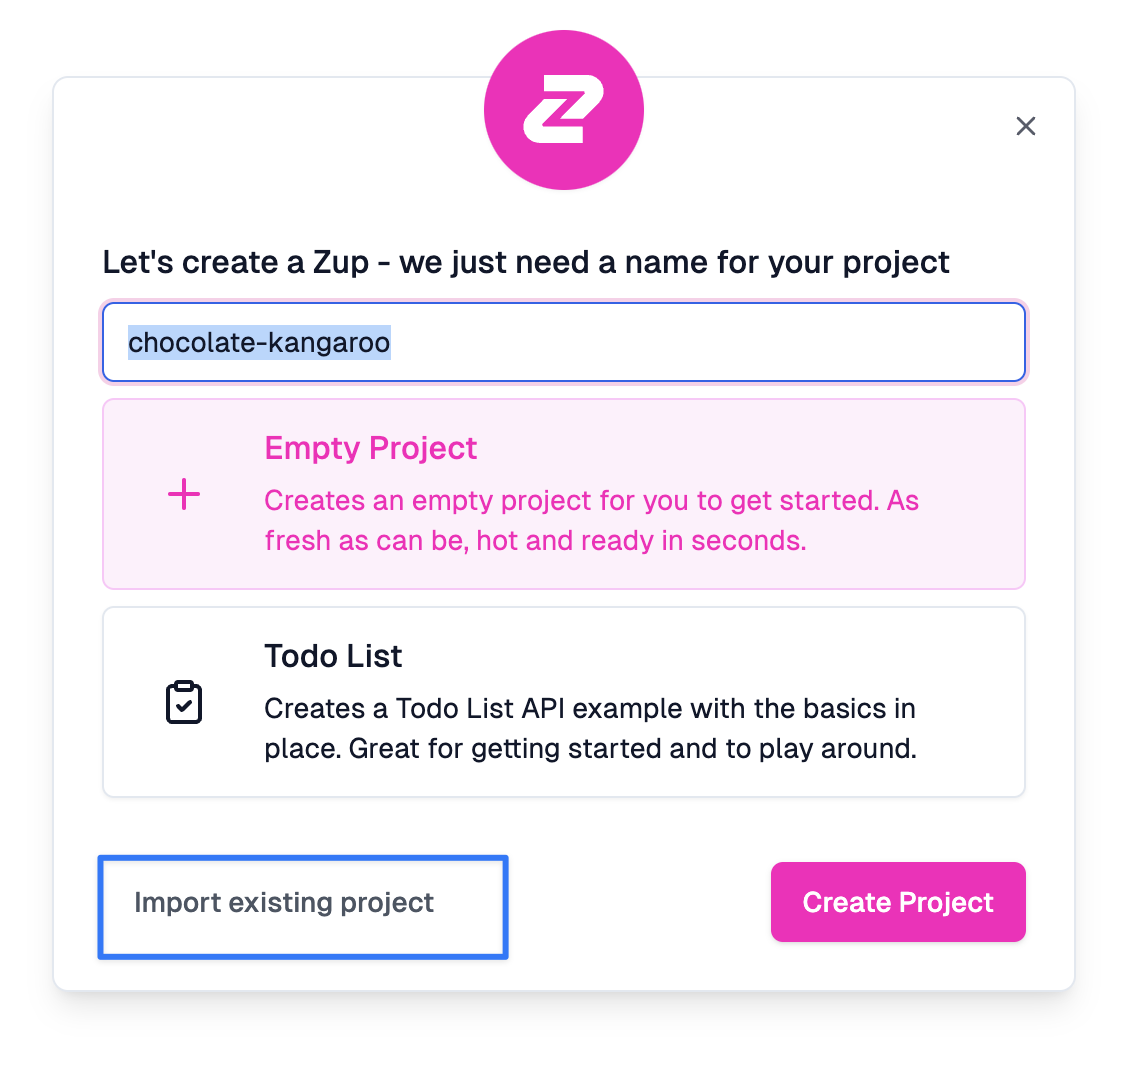
If you have an existing GitHub repository that contains a Zuplo project, you can connect to that repository when you create a new project. Select Import existing project then select your GitHub organization and repository.
What's Included
With GitHub connected, you get:
- Automatic deployments — Every push deploys to Zuplo automatically
- Branch environments — Each branch gets its own isolated environment
- Deployment status — See deploy results as GitHub checks on commits and PRs
- Portal sync — Push and pull changes between the Zuplo portal and GitHub
Next Steps
- Testing Deployments — Run tests automatically after each deploy
- Custom GitHub Actions — Advanced workflows with approval gates and multi-stage deployments
- Branch-Based Deployments — How branches map to environments
Frequently Asked Questions
What happens if I disconnect my repository?
If you disconnect your repository, you can go back to source control settings and reconnect it.
What happens if I rename my repository?
Renaming your repository will break the connection. You must disconnect and reconnect to restore the link.
Can I connect multiple Zuplo projects to the same repo?
No, each Zuplo project must be connected to a unique GitHub repository.
My project isn't deploying, what do I do?
First, check the deployment status in GitHub. If there is an error message, follow the instructions to resolve it. Next, check that the Zuplo GitHub app is installed in your organization and has access to the repository where your Zuplo projects are located. If you need help, contact Zuplo support.