

MCP Gateway quickstart (Portal)
Choose your Development Approach
Select how you'd like to build your gateway. You can switch between approaches at any time.
Portal Development
Build and deploy your gateway using Zuplo's web-based portal. No local setup required.
Build a Zuplo MCP Gateway fronting Linear at
https://<your-gateway>/mcp/linear-v1, entirely in the browser. By the end,
Claude Desktop signs in through your identity provider, connects your Linear
account over the gateway's per-user OAuth flow, and answers "list my open Linear
issues" with real results, logged in your analytics.
The MCP Gateway Virtual Server wizard scaffolds the route and policies for you: pick an upstream, an identity provider, what to expose, and how to authenticate upstream. This guide uses Linear and Auth0, but the wizard supports any upstream in its library (plus custom servers) and every identity provider Zuplo wraps.
Prefer the CLI? The local quickstart reaches the same result on your machine.
Prerequisites
- A free Zuplo account.
- An account with your identity provider. For the Auth0 example, that's an Auth0 tenant with a Regular Web Application configured. The Configuring Auth0 guide covers the dashboard side. From it you'll need the domain, client ID, and client secret.
-
Create a project and start a Virtual Server
Sign in to the Zuplo Portal and create a new empty project (choose a blank project rather than importing one). The project opens on the Project tab; click the Code tab.
Click Add Route, then choose MCP Gateway Virtual Server from the menu.
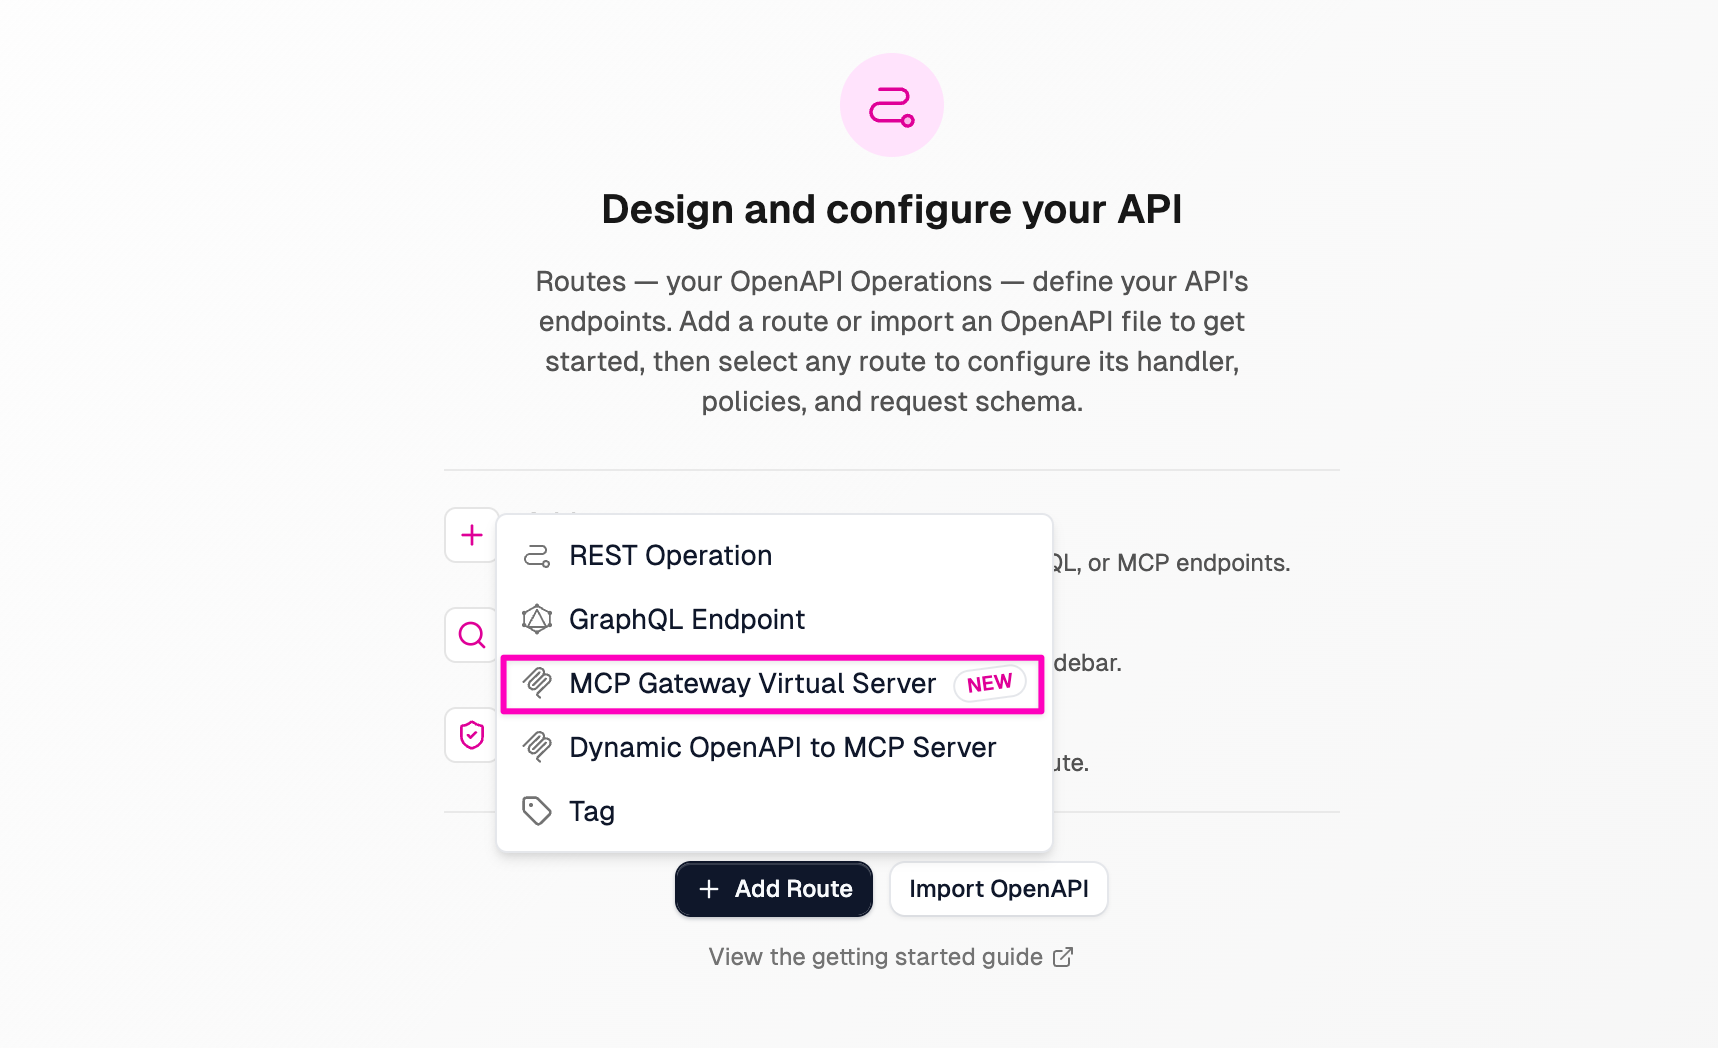
The New MCP Gateway Virtual Server wizard opens and walks through four steps: the upstream server, inbound auth, tools, and outbound auth.
-
Choose the upstream MCP server
On the Upstream step, pick the MCP server this virtual server fronts. Select Linear from the Library of pre-configured servers. The Name and MCP URL (
https://mcp.linear.app/mcp) fill in automatically, and the Path defaults to/mcp/linear-v1. These fields are editable, but a pre-configured server already has the correct MCP URL, so leave it as-is. Click Next.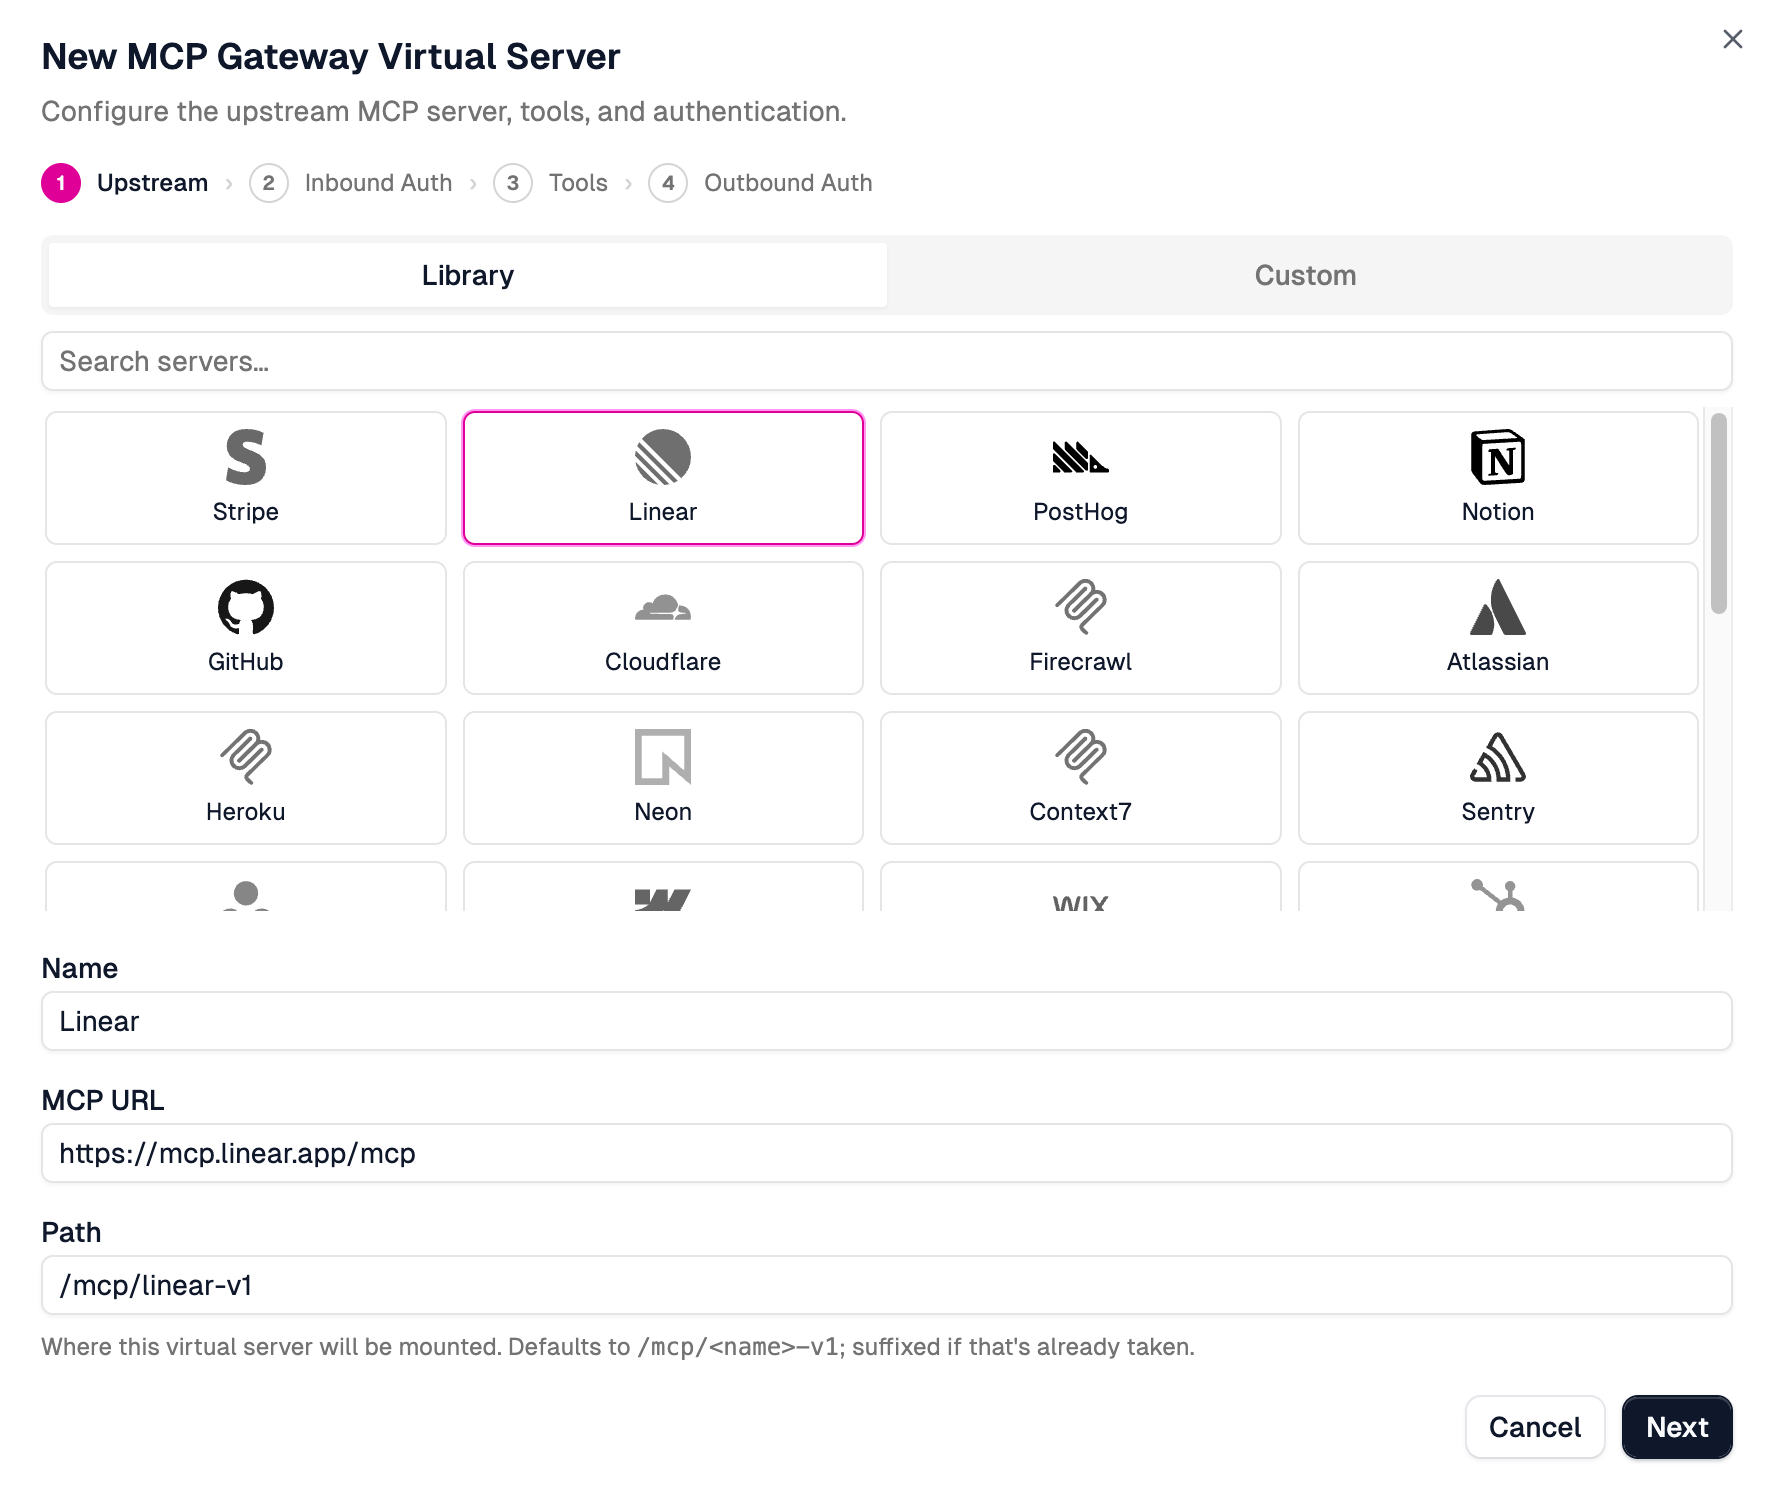
The Custom tab lets you point at your own MCP server or any third-party server that isn't in the library. Just supply its name and MCP URL.
-
Choose an identity provider
The Inbound Auth step controls how MCP clients authenticate to the gateway. Pick your identity provider; this guide uses Auth0. The wizard scaffolds a new inbound OAuth policy for that provider. Click Next.
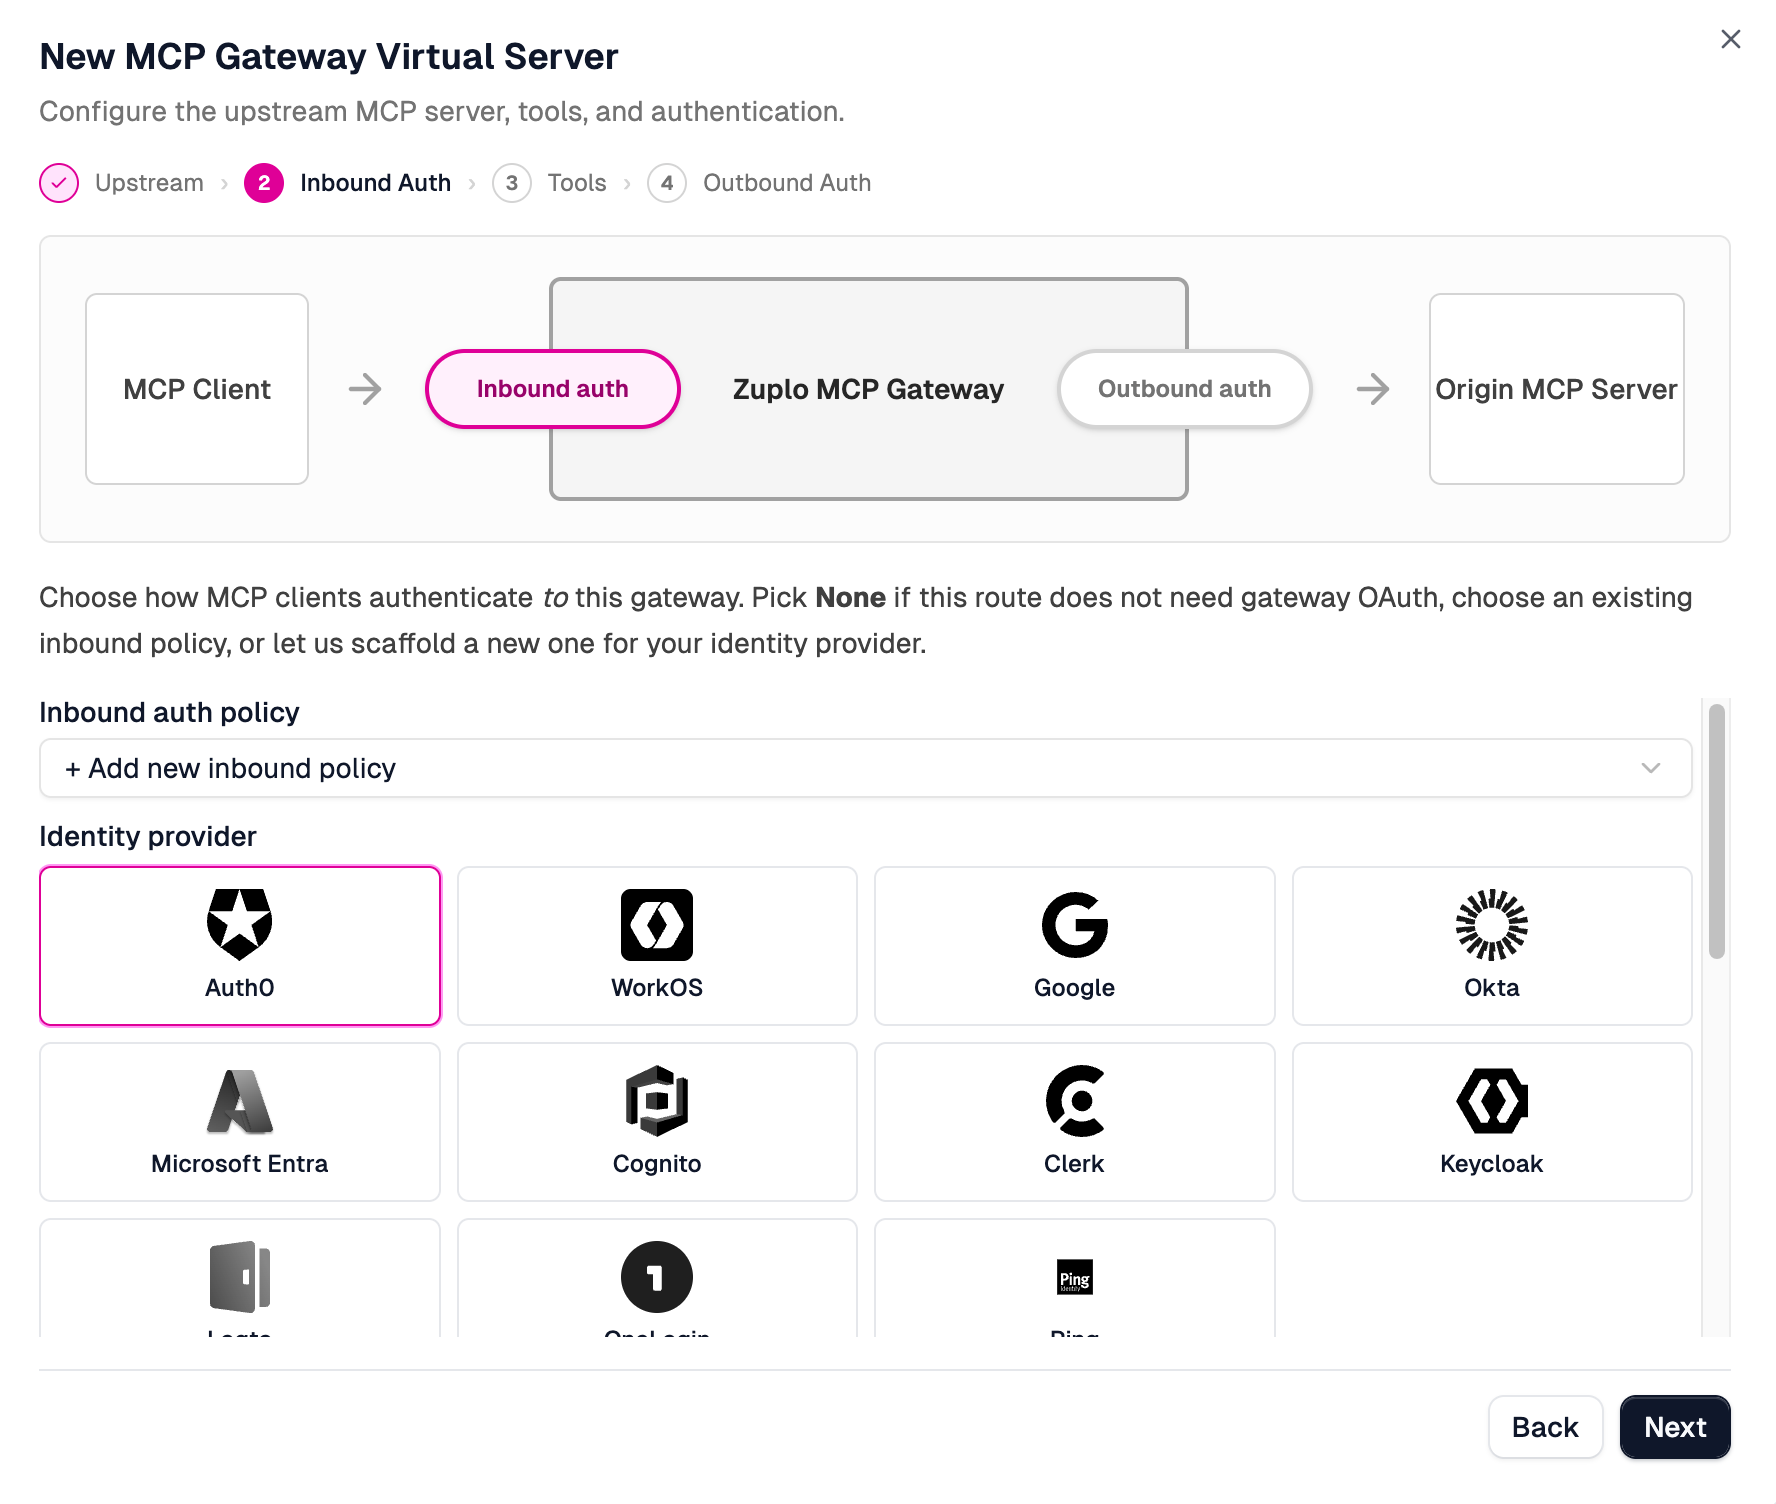
Not using Auth0?
The catalog includes WorkOS, Google, Okta, Microsoft Entra, Cognito, Clerk, Keycloak, Logto, OneLogin, and PingOne. You can also select an existing inbound policy, or pick None if this route doesn't need gateway OAuth. See the provider catalog.
-
Decide what the virtual server exposes
The Tools step controls which tools, prompts, and resources the virtual server exposes to its clients:
- Passthrough federates the upstream's catalog live. Zero config, and the safest default. Everything the upstream offers is exposed.
- Curate lets you pick specific tools, prompts, and resources. Use this to control what users can do. For example, drop all destructive tools and expose only read and write tools.
Choose Passthrough and click Next.
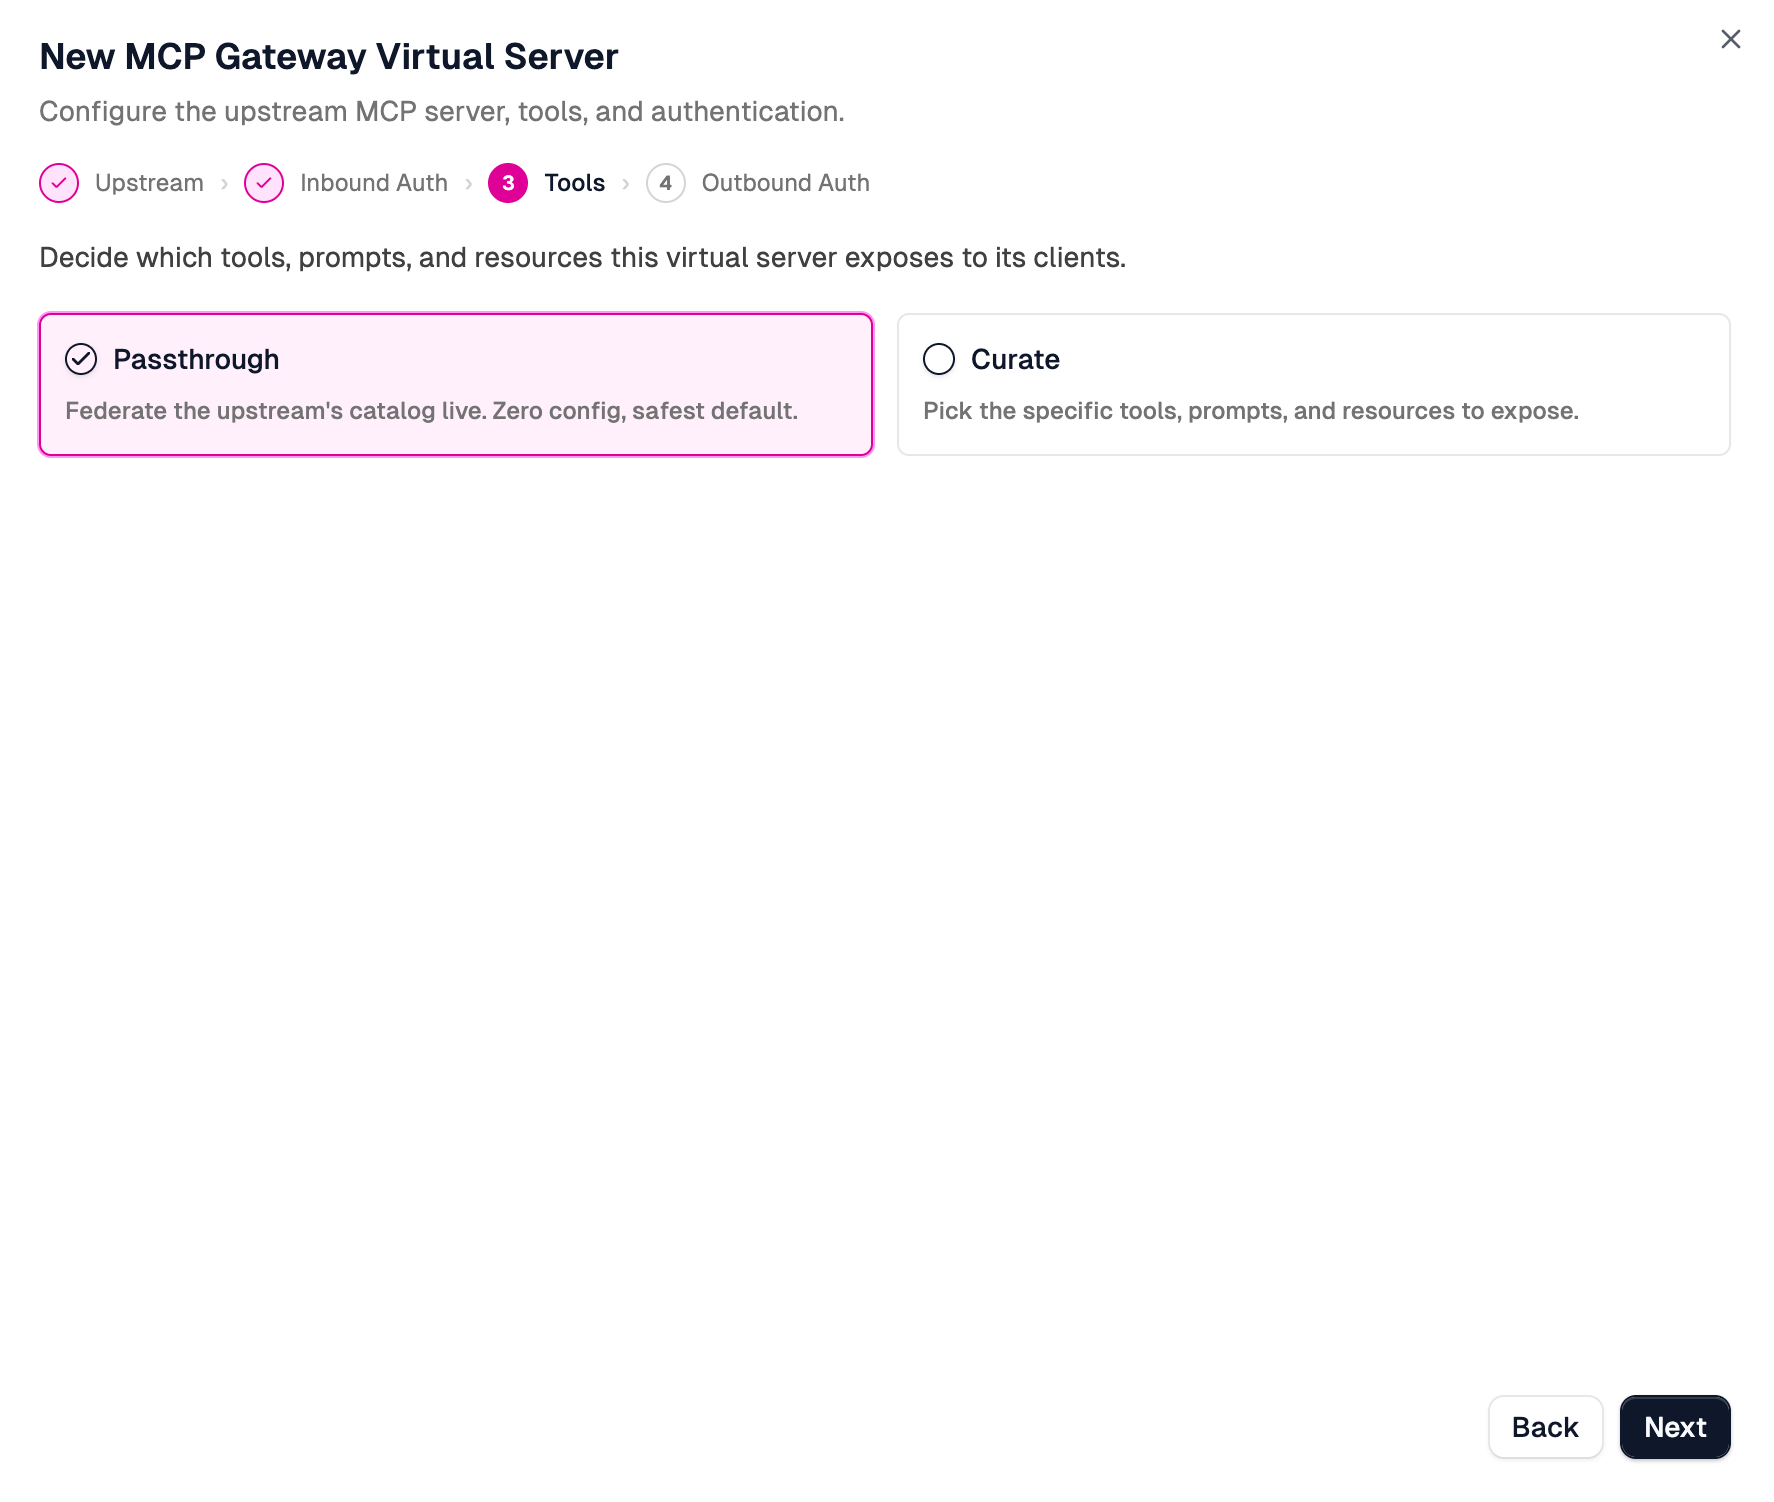
Curate requires signing in to the upstream service so the wizard can enumerate the catalog to pick from. Passthrough needs no sign-in.
-
Configure upstream authentication
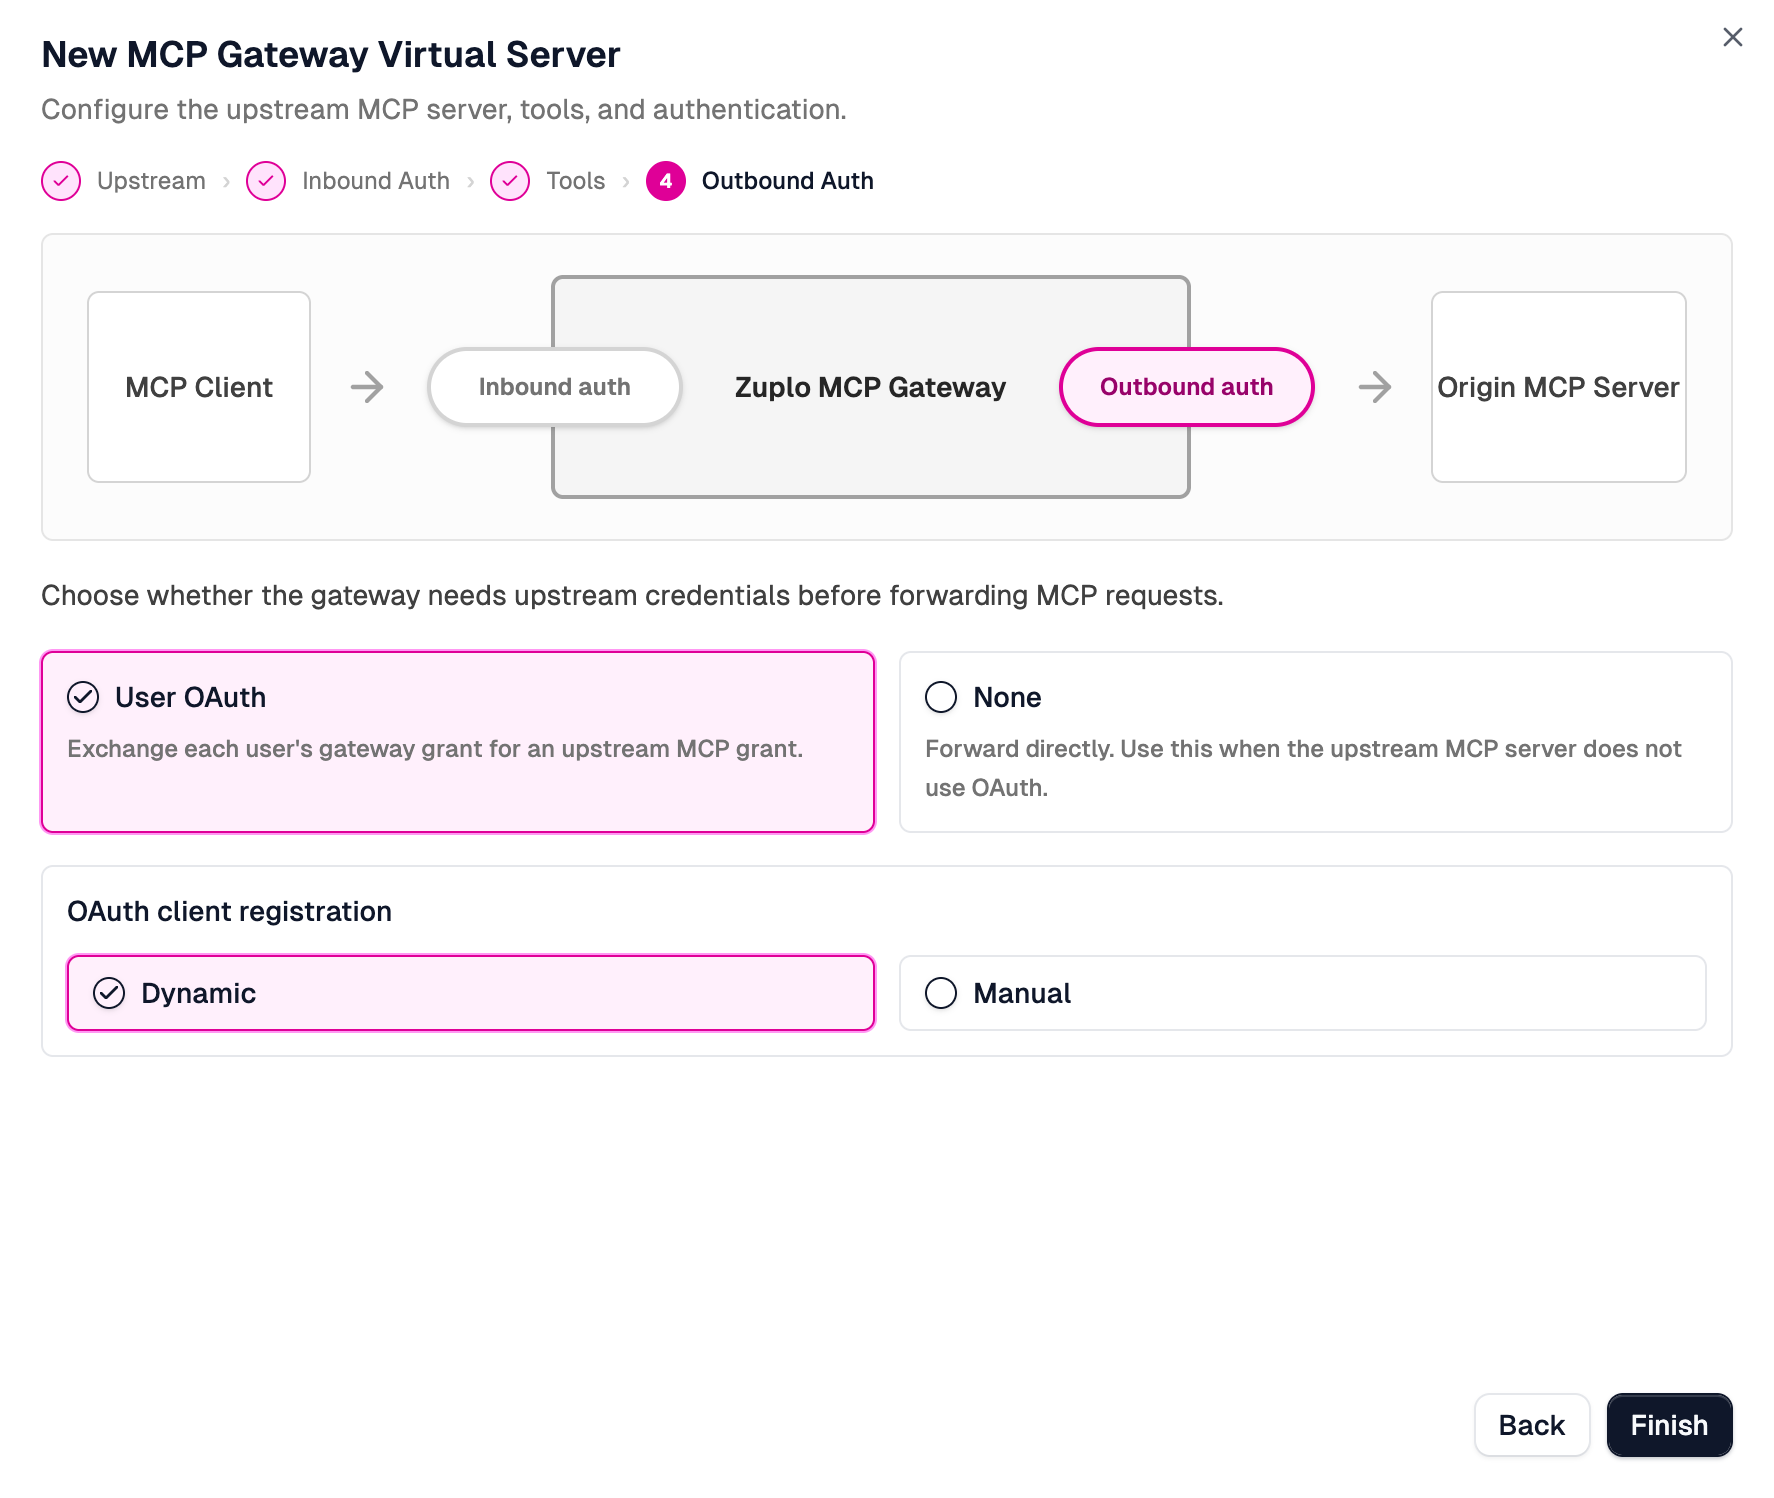
The Outbound Auth step controls whether the gateway needs upstream credentials before forwarding MCP requests. Linear requires OAuth, so choose:
- User OAuth: exchange each user's gateway grant for an upstream MCP grant, so every user connects their own Linear account.
- Dynamic OAuth client registration: the gateway registers itself with Linear's OAuth server on demand, so no upstream client credentials are needed.
Both are the defaults. Click Finish.
Upstream doesn't use OAuth?
Pick None to forward directly. The user's token is then either forwarded to the upstream or removed at the point of login, depending on the upstream's needs.
The wizard adds the new MCP route to
config/routes.oas.jsonand scaffolds the inbound auth and token-exchange policies. Save the project. -
Set your identity provider's environment variables
The scaffolded inbound auth policy reads your provider's credentials from environment variables, so set those before testing. Open your project's Settings from the navigation bar, then click Environment Variables under Project Settings.
Add one variable per credential. For the Auth0 example:
Name Value Secret? MCP_AUTH0_DOMAINyour-tenant.us.auth0.comNo MCP_AUTH0_CLIENT_IDyour application client ID Yes MCP_AUTH0_CLIENT_SECRETyour application secret Yes Check the Secret box for the client ID and secret so their values are hidden in the encrypted secret store.
MCP_AUTH0_DOMAINisn't sensitive, so leave it unchecked. Click Save for each.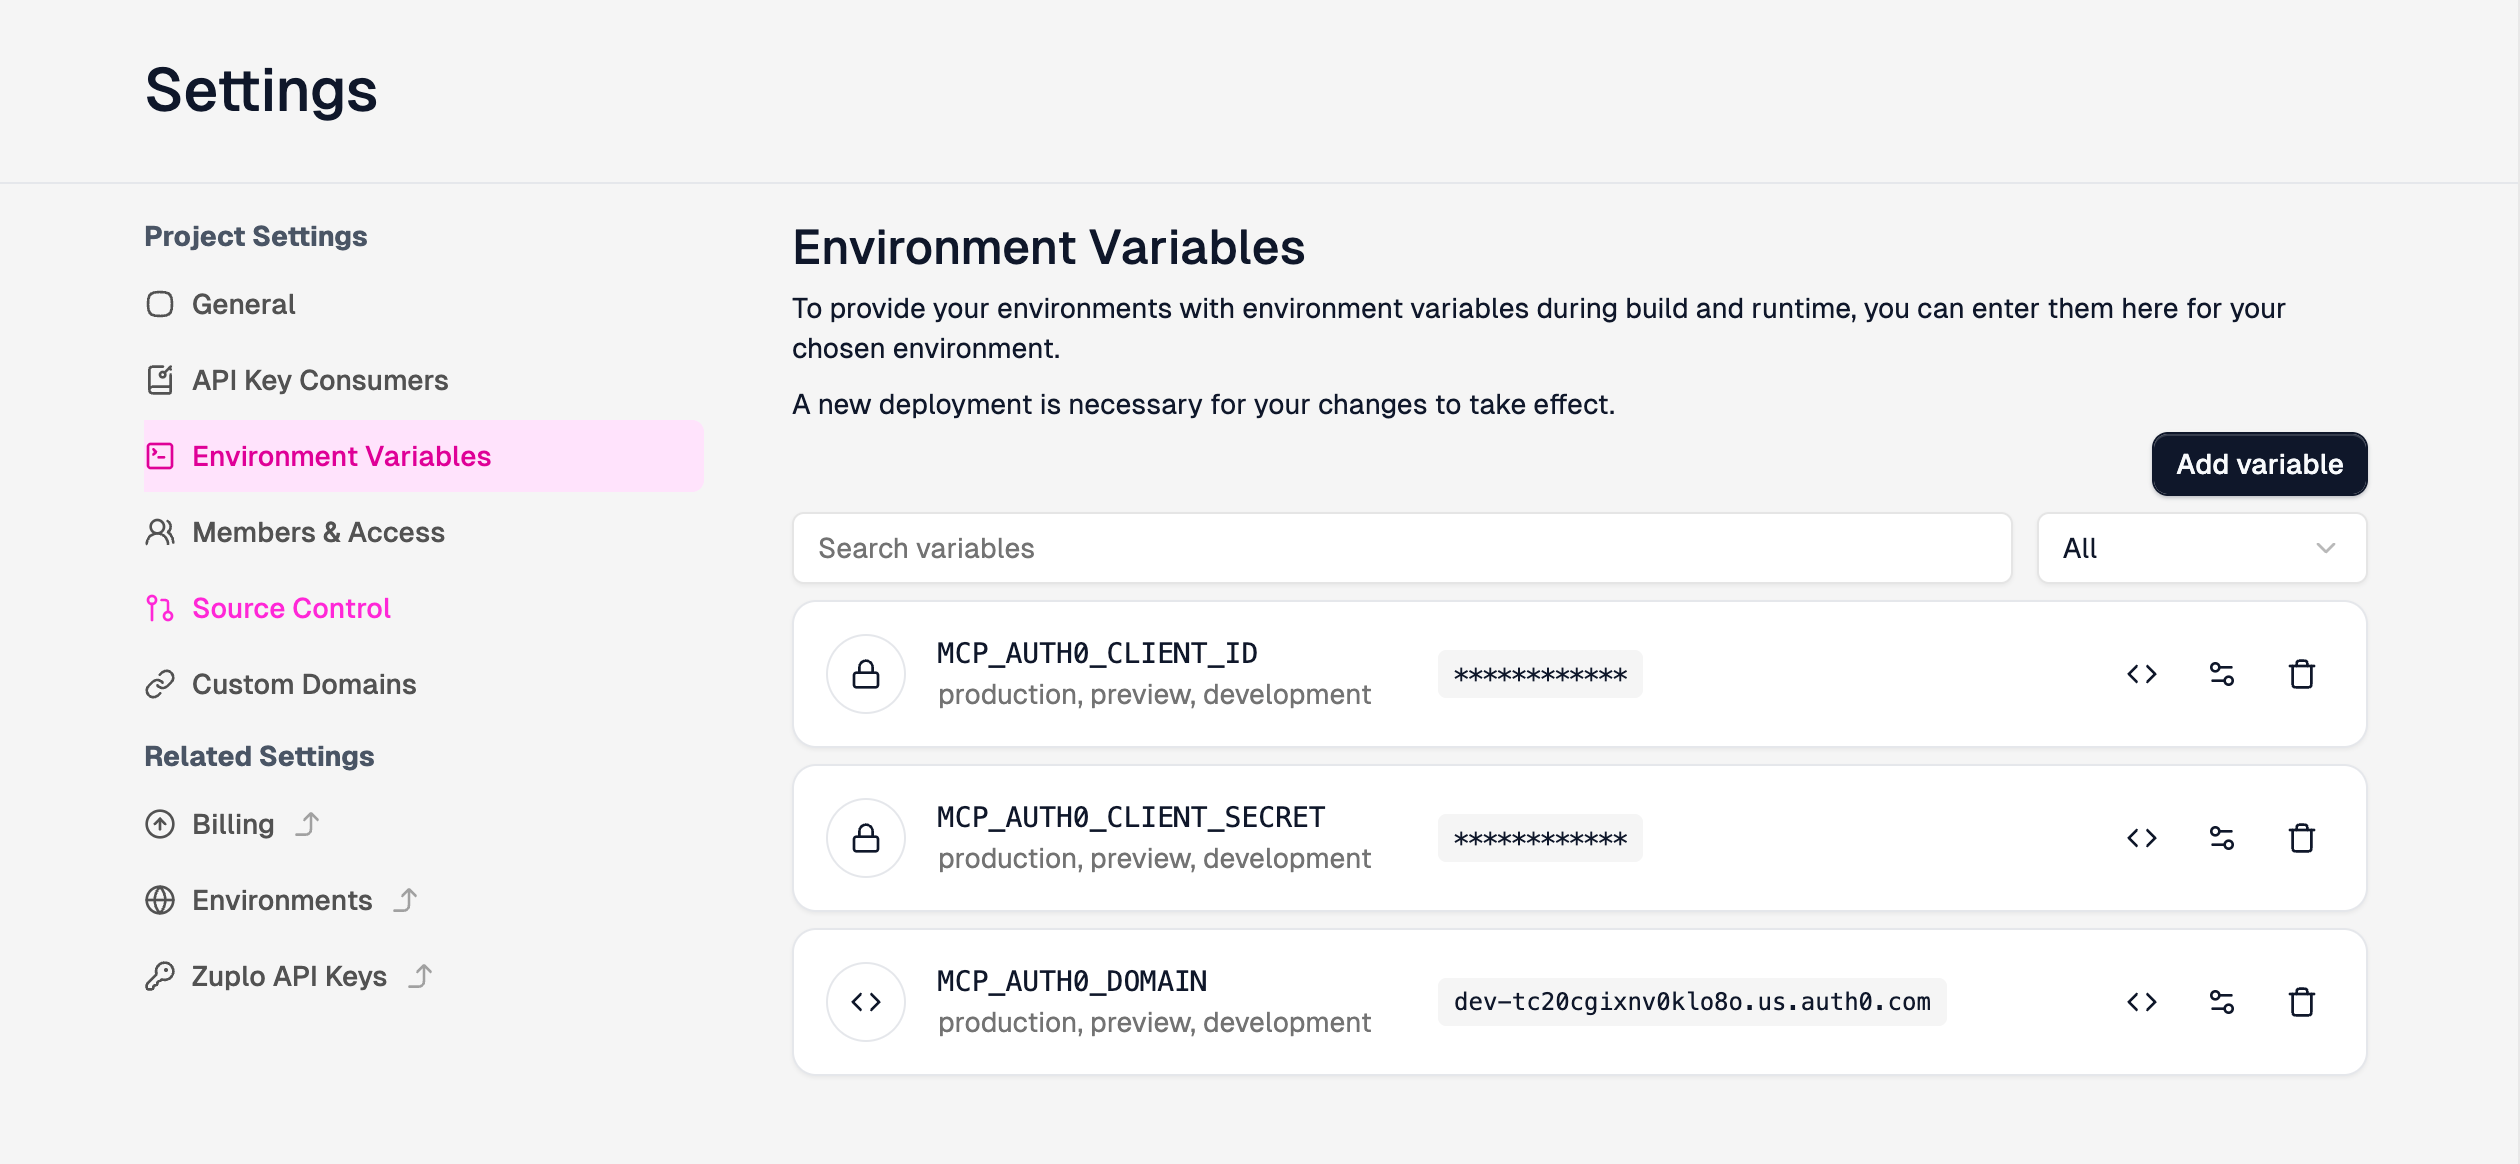
A new deployment is needed for environment variable changes to take effect.
MCP_AUTH0_DOMAINis a bare hostname (my-tenant.us.auth0.com), not a URL.Using a different provider?
Set whatever variables your provider's scaffolded policy expects instead. The policy in
config/policies.jsonshows the$env(...)references it reads. -
Verify the OAuth policy is wired up
Click the Test button next to the route's path and send a
POSTwith noAuthorizationheader. You should get a401 UnauthorizedwhoseWWW-Authenticateheader challenges for OAuth. Example:Code(
<your-zuplo-gateway>is your deployment's host.) That 401 is the gateway telling a future MCP client "you need to authenticate first." It confirms the OAuth policy is loaded. If you see a 200, 404, or 500, the OAuth policy isn't attached to the route.Test with the MCP Inspector
The Test panel also shows a ready-to-run MCP Inspector command with your route's URL pre-filled. Copy it, run it in your terminal, and step through the full OAuth flow against the live route.
-
Connect Claude Desktop
Your route is live at
https://<your-gateway>/mcp/linear-v1. Find the public URL via the Gateway deployed button in the toolbar.Open Claude Desktop, go to Settings → Connectors, scroll to the bottom, and click Add custom connector. Paste the route URL and click Add.
Claude Desktop opens the gateway's OAuth flow in a browser:
- Sign in with your identity provider (Auth0 in this example).
- The gateway's consent page lists Linear with a Connect button.
- Click Connect, complete Linear's OAuth flow, then click Authorize to finish.
Checkpoint: Claude is connected
Back in Claude Desktop, the new connector appears in Settings → Connectors marked as connected. Subsequent requests reuse the tokens the gateway just issued.
For per-client setup details, see Connect MCP clients.
-
Test it
In Claude Desktop, prompt the model with something that requires Linear. "list my open issues" works well. Claude asks for permission to call the tool, then returns results proxied through the gateway.
Open the project's Analytics dashboard and switch to the MCP tab to see the call appear in the events timeline, the success rate, the top capabilities table, and the user breakdown.
You now have a working MCP Gateway in front of Linear: Claude Desktop authenticates against your identity provider, the gateway exchanges that for a per-user Linear token, and every call lands in your analytics. Run the wizard again for each additional upstream you want to front.
Deploy to production before sharing
The Working Copy (Development) URLs are fine for testing everything above. Once you've confirmed the virtual server works, set up a production deployment via environments before giving others access. The development URL is tied to your working copy and isn't meant for shared or production traffic.
Next steps
- Connect more clients: Claude Code, Cursor, VS Code, ChatGPT, and any other MCP client.
- How it works: the request lifecycle and the two OAuth surfaces.
- Capability filtering: go deeper on the Curate option, overriding tool descriptions and annotations, not just include/exclude.
- Add more upstreams: front several upstream MCP servers from one Zuplo project.