

Quickstart — Monetize Your API
This guide walks you through setting up API monetization from scratch.
Outcomes
By the end of this quickstart, you have:
- A pricing page in your Developer Portal where customers can browse and compare plans
- Stripe-powered checkout so customers can subscribe and pay directly
- Plan-scoped API keys that are automatically issued when a customer subscribes
- Usage metering that tracks API calls per subscription in real time
- Quota enforcement that limits or bills for overages based on each customer's plan
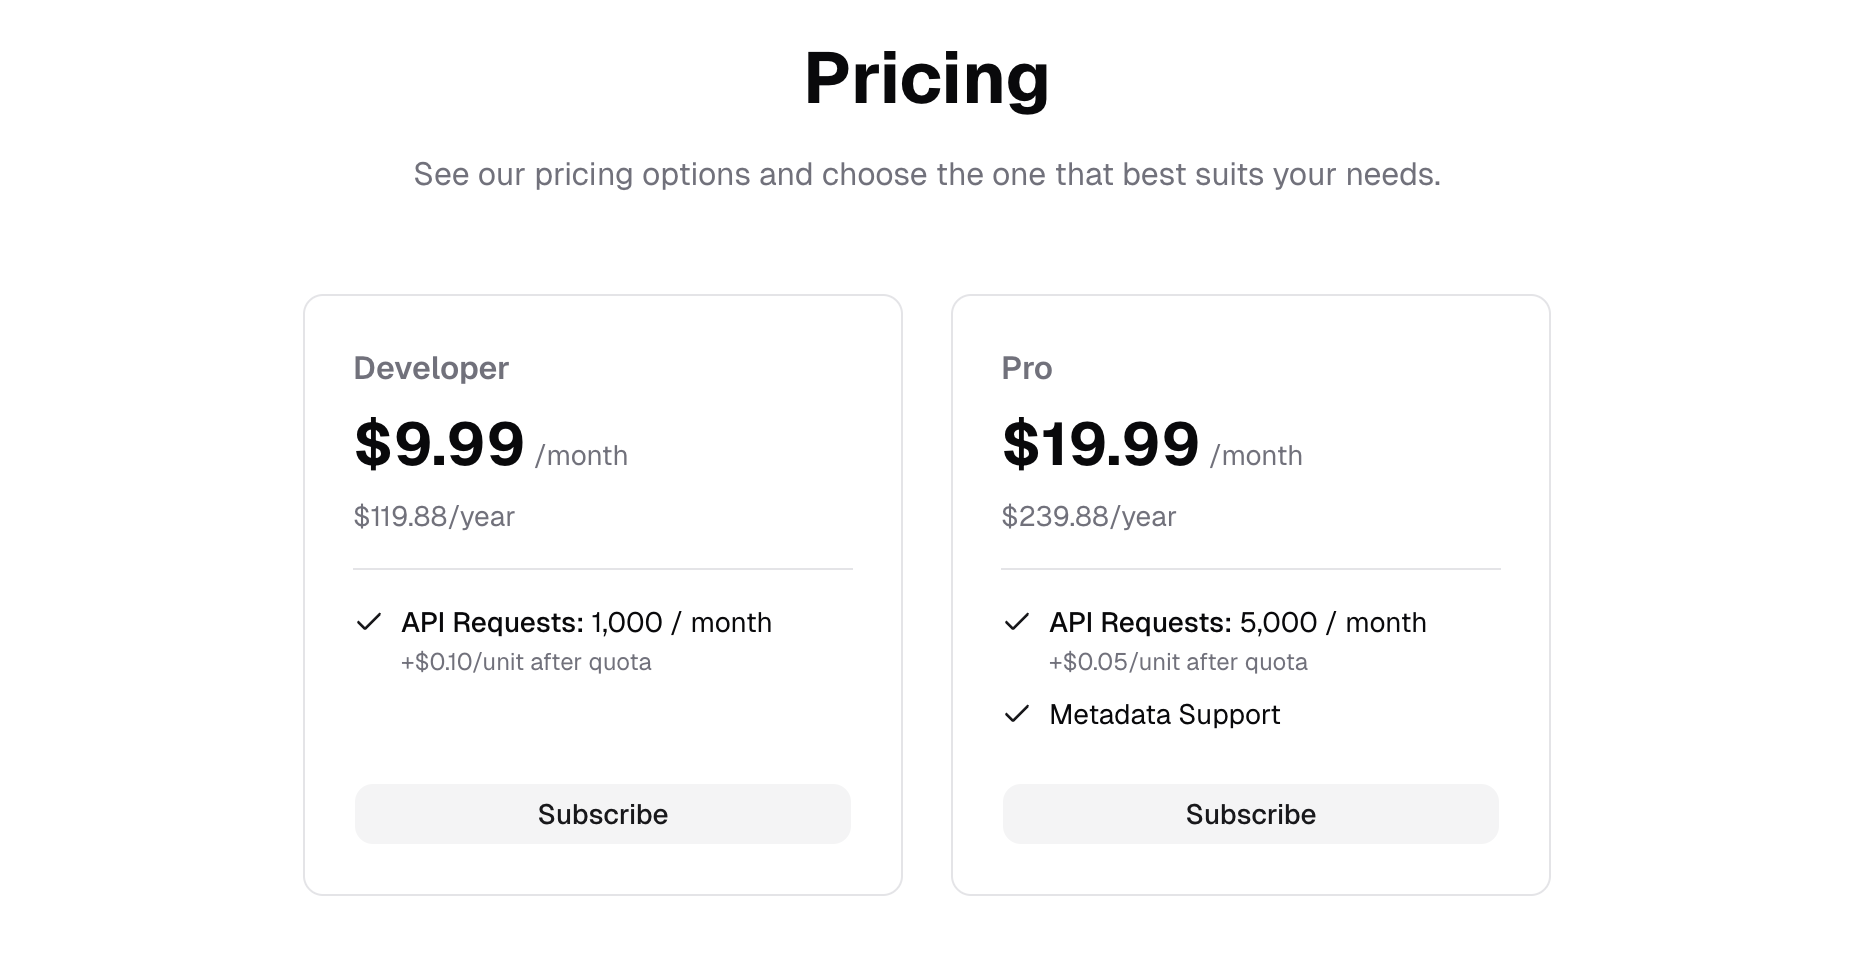
You'll set up two example plans (Developer and Pro) with tiered pricing, included request quotas, and per-request overage billing.
Prerequisites
- A Zuplo account
- A Stripe account (sandbox mode is fine for setup)
Step 1: Create a new project
- Go to portal.zuplo.com and sign in.
- Click New Project in the top right corner (open).
- Enter a Project name or use the randomly chosen name Zuplo provides.
- Select Starter Project (Recommended) — it comes with endpoints ready to monetize.
- (Optional) Connect your project to source control by clicking the Connect to GitHub button on the project page, or by following the GitHub setup guide. This isn't required for monetization, but is recommended for managing your project long-term.
Step 2: Enable the monetization plugin
Add the monetization plugin to your Developer Portal configuration.
-
In your project, navigate to the Code tab.
-
In the file tree, open
docs/zudoku.config.tsx. -
Add the monetization plugin import at the top of the file:
Code -
Add the plugin to the
pluginsarray in your config:Code -
Save the file and wait for the environment to deploy.
Step 3: Configure the Monetization Service
- Open the Services tab in your project.
- Select the environment you want to configure. We will use Working Copy for this quickstart.
- Click Configure on the Monetization Service card.
Step 4: Create a meter
Meters track what you want to measure — API calls, tokens processed, data transferred, etc.
- In the Monetization Service, click the Meters tab.
- Click Add Meter and select API Requests from the template list.
- Verify the pre-filled meter details:
- Name:
API Requests - Event:
api_requests— the type of event this meter listens for. - Description:
Counts all incoming API requests - Aggregation:
SUM— how values are combined (other options includeCOUNT,MAX, etc.). - Value Property:
$.total— a JSONPath expression that extracts the value from each event.
- Name:
- Click Add Meter to save.
Step 5: Create features
Features define what your customers get access to. They can be tied to meters (for usage-based features) or standalone (for boolean features like "Metadata Support").
In the Monetization Service, click the Features tab, then click Add Feature for each of the following:
| Name | Key | Linked Meter | Purpose |
|---|---|---|---|
| API Requests | api_requests | API Requests | Usage-based (linked to meter) |
| Metadata Support | metadata_support | — | Boolean on/off feature |
Key Naming Conventions
The meter key, the feature key, and the key in the monetization policy's
meters configuration must all match. For example, the API Requests meter key
is api_requests, the feature key must also be api_requests, and the policy
must use "meters": { "api_requests": 1 }.
See Naming Consistency for the full rule.
Step 6: Create plans
Plans bring together your features with pricing and entitlements. Create two plans to give your customers options.
Create the Developer plan
-
In the Plans tab, click Add Plan.
-
Fill in the plan details:
- Plan Name:
Developer - Key:
developer
- Plan Name:
-
Click Create Draft.
-
Configure the rate cards from the Add rate card dropdown in the Features & Rate Cards section. The dropdown groups rate cards by whether they're tied to a feature; the Billing-only section at the bottom lets you add a flat-rate line item that isn't tied to any feature.
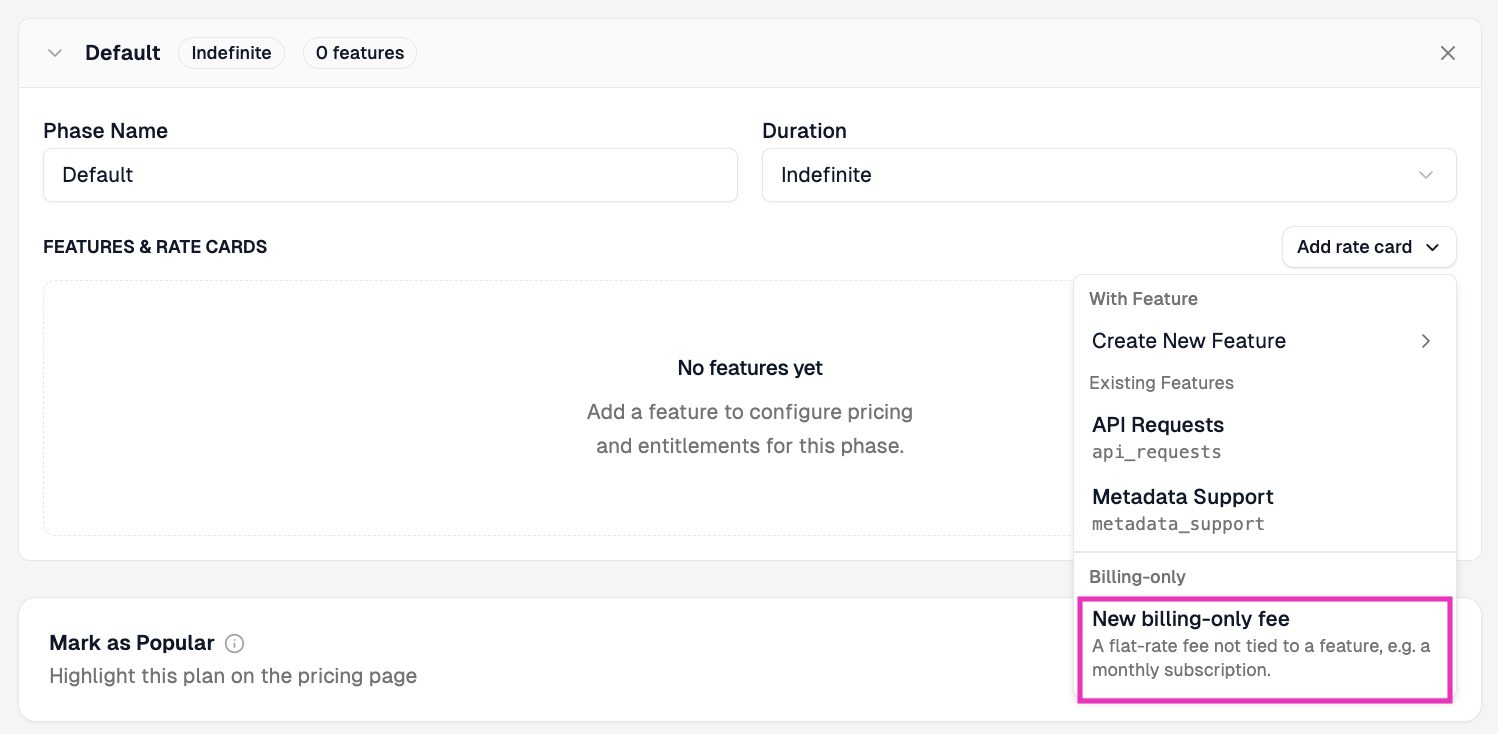
Under Billing-only, click New billing-only fee. The Portal pre-fills the name as
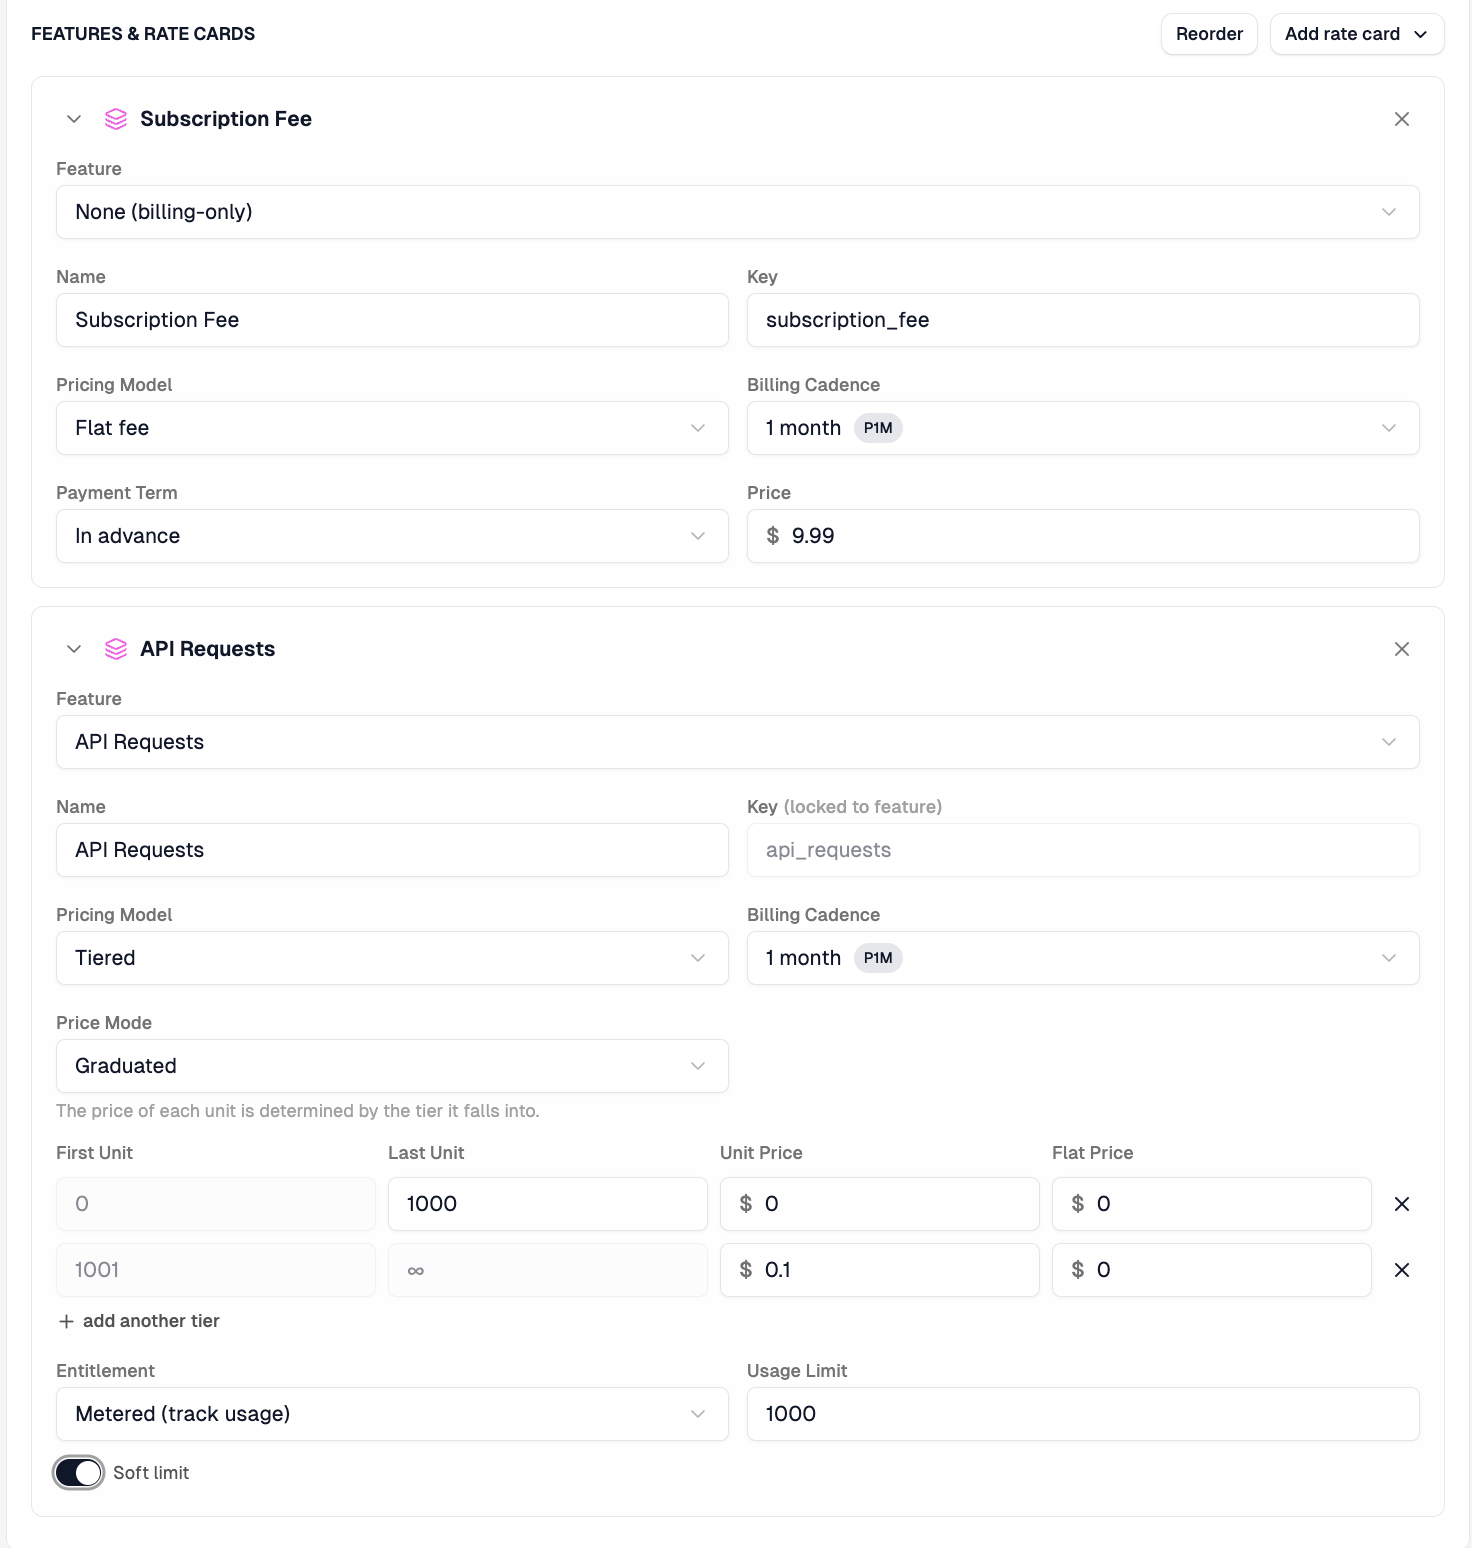
Subscription Feeand the key assubscription_fee. Leave those as-is and set the rest as shown below:Subscription Fee:
Setting Value Feature None (billing-only) Pricing Model Flat fee Billing Cadence Monthly Payment Term In advance Price $9.99 Next, click Add rate card again. Under Existing Features, choose API Requests and set it up as shown below:
API Requests:
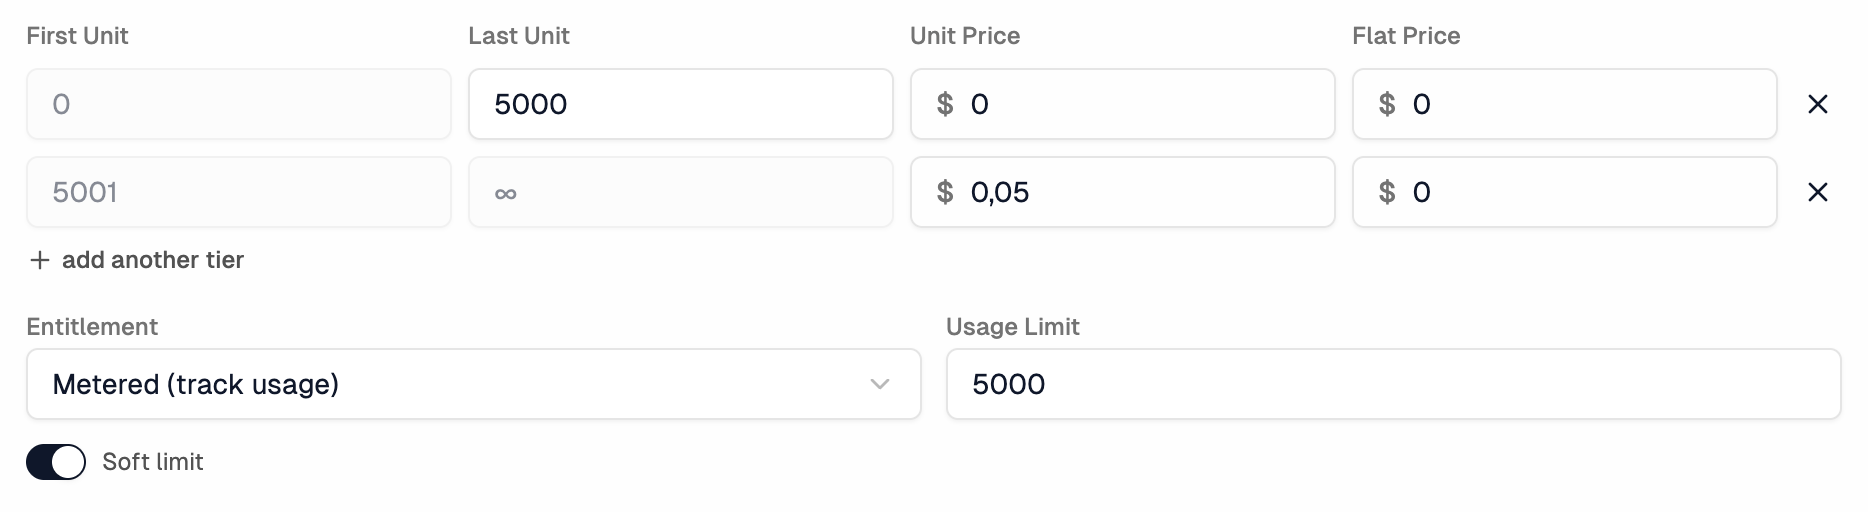
Setting Value Pricing Model Tiered Billing Cadence Monthly Price Mode Graduated Tier 1 Click + add another tierand set First Unit0, Last Unit1000, Unit Price $0, Flat Price $0Tier 2 First Unit 1001, to infinity, Unit Price $0.10, Flat Price $0Entitlement Metered (track usage) Usage Limit 1000Soft limit Enabled Your Features & Rate Cards section should now look like this:
-
Click Save.
Create additional plans
You don't have to complete all the above steps again to create the next plan. You can duplicate a plan you already created.
Click the Pricing tab in the left sidebar, then on the ... context menu on the right of the Developer Plan.
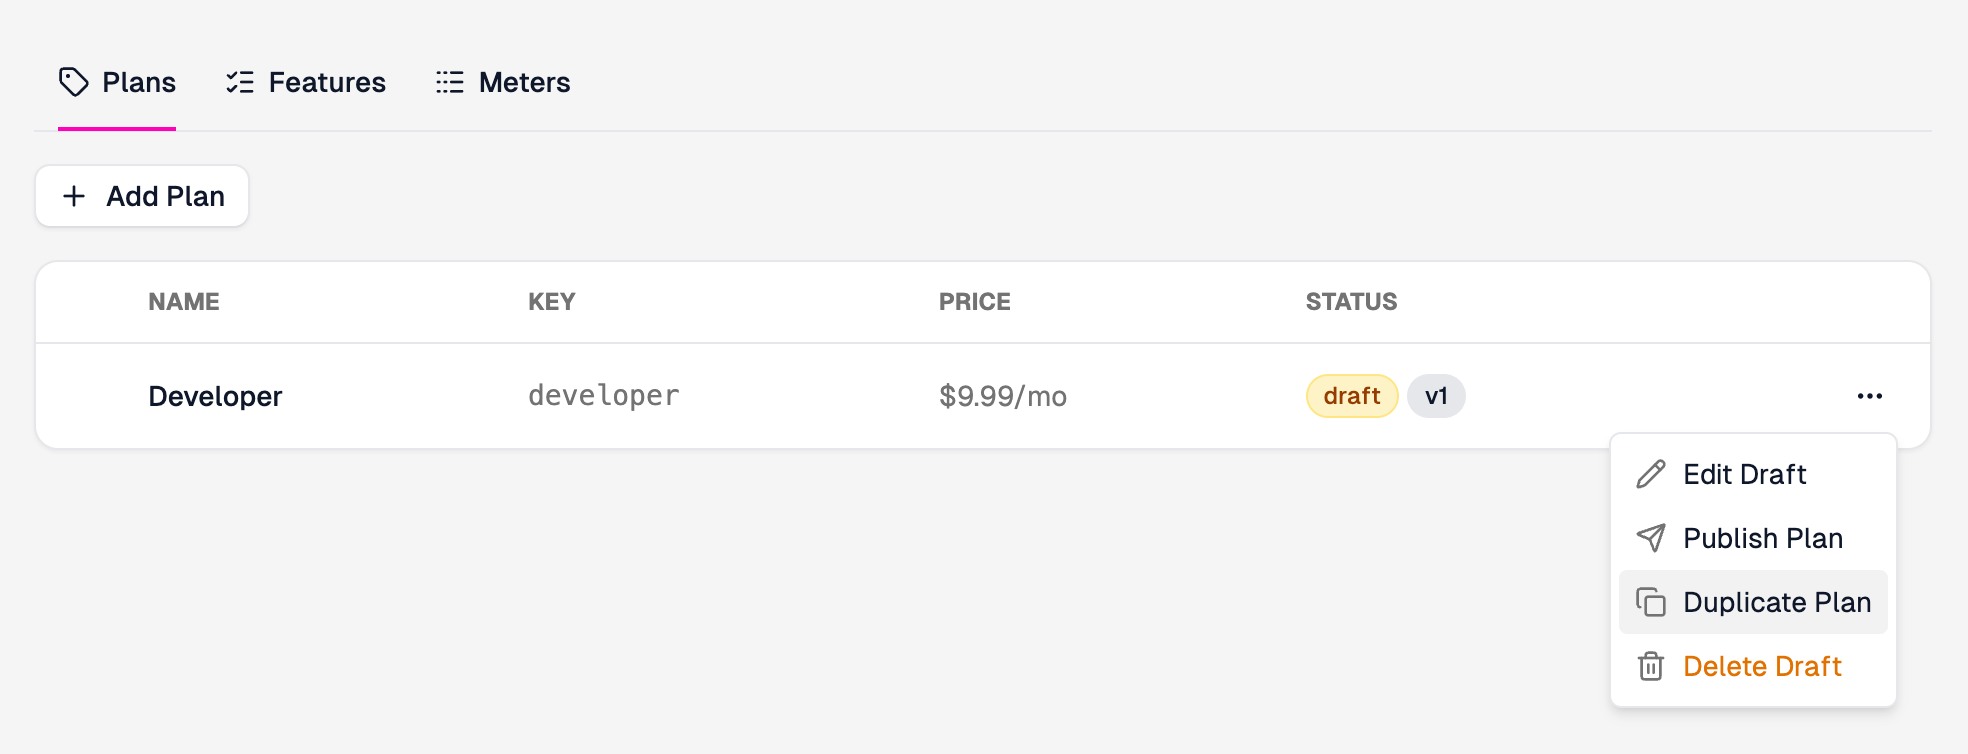
This will create a copy of the Developer plan that you can rename.
Using the values in the table below, set up a new plan named Pro.
The only structural differences are the pricing, request amounts, and the
addition of a Metadata Support rate card (set Pricing Model to Free
and Entitlement to Boolean (on/off)).
| Plan | Key | Subscription Fee | Included Requests | Overage Rate | Metadata Support |
|---|---|---|---|---|---|
| Developer | developer | $9.99 | 1,000 | $0.10/req | No |
| Pro | pro | $19.99 | 5,000 | $0.05/req | Yes |
For the API Requests rate card on each plan, set Tier 1 Last Unit to the "Included Requests" value and Tier 2 Unit Price to the "Overage Rate" value. The Usage Limit should match the "Included Requests" value. Enable Soft limit on all plans.
Reorder your plans
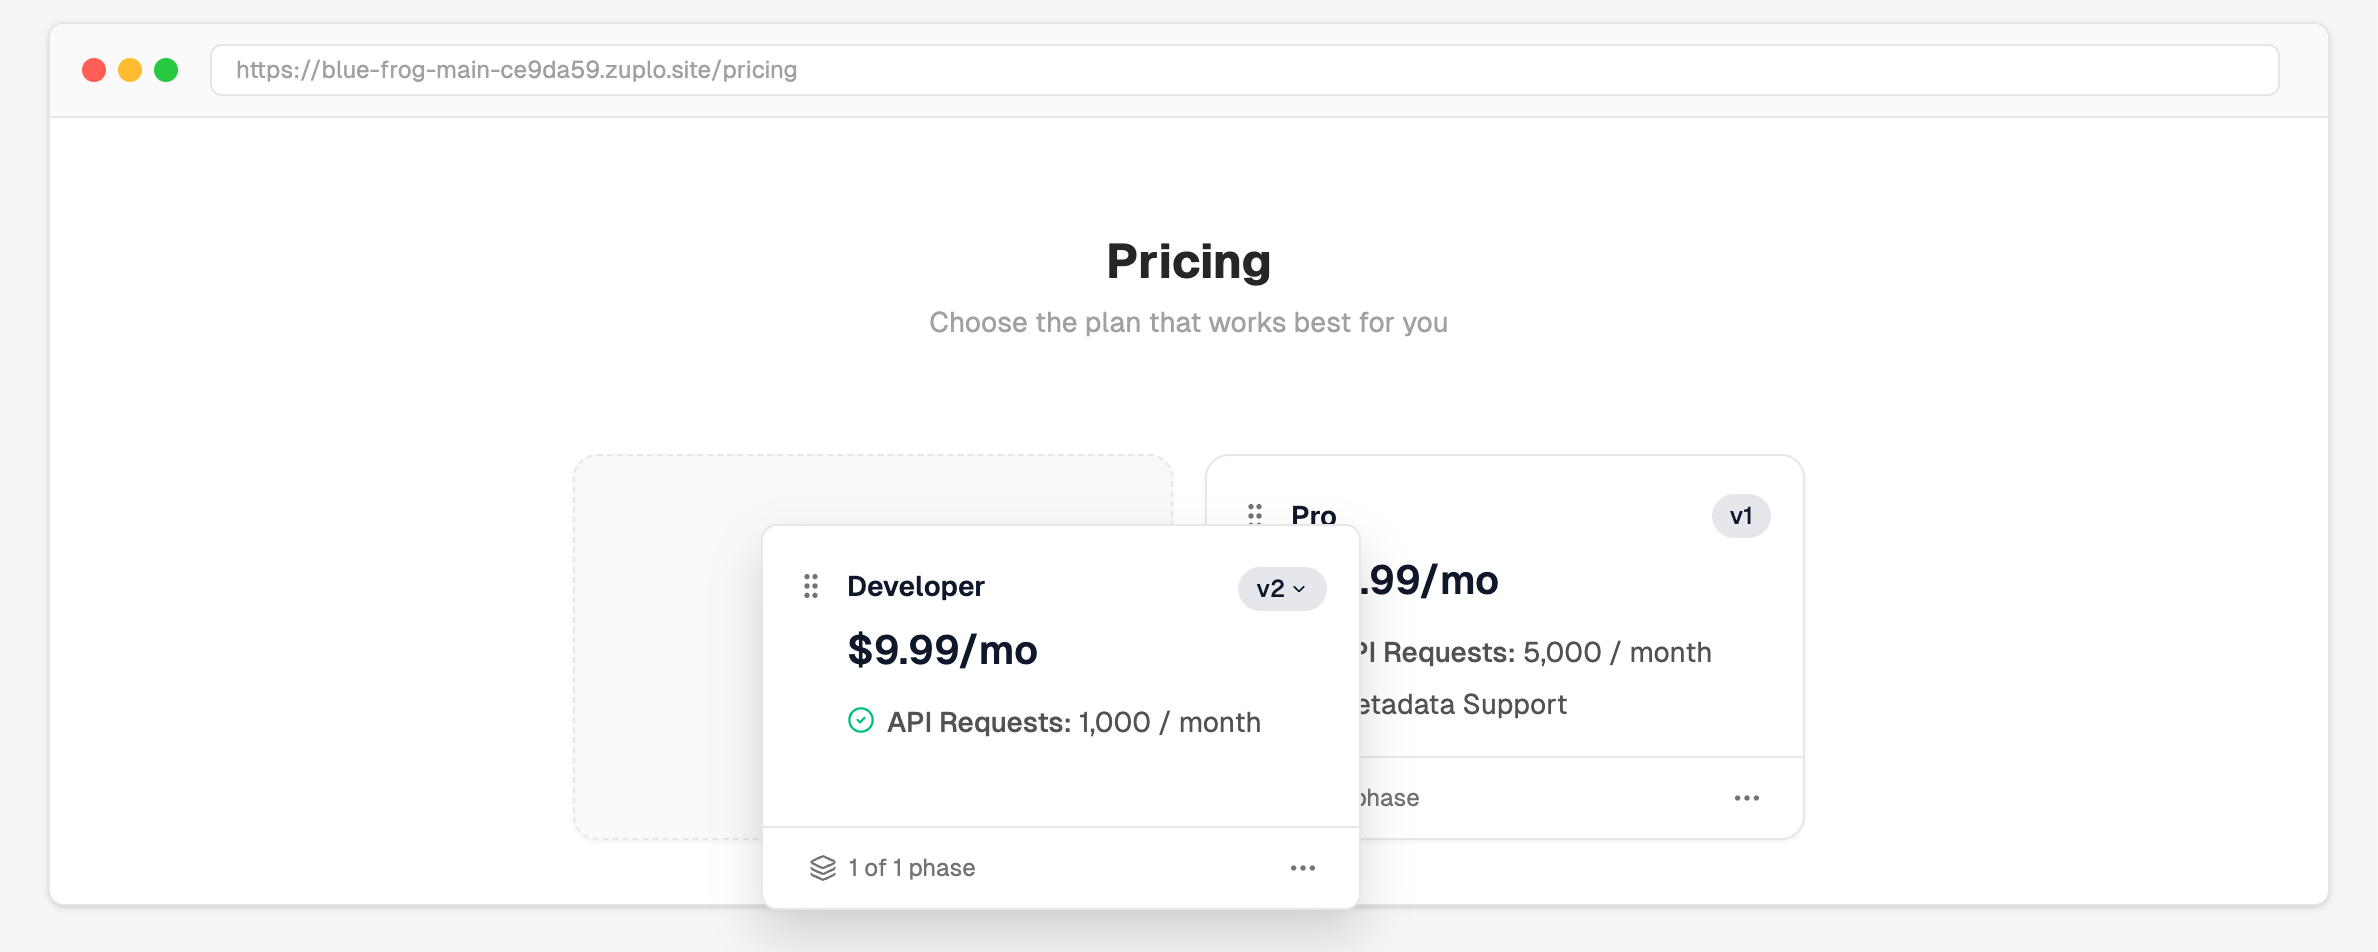
The Pricing Table in the left sidebar determines how plans appear on the pricing page. Drag and drop the plans using the handle on the top-left corner of each card to reorder them as Developer and Pro.
Publish your plans
Each plan starts as a draft. Publish each one before customers can subscribe.
- On the Pricing tab, click the ... context menu on the plan you want to publish.
- Select Publish Plan.
- Repeat for all plans.
For more plan configurations (including trial periods and multiple tiers), see Plan Examples.
Step 7: Connect Stripe
For testing, use Stripe's sandbox mode so you can simulate payments without real charges.
- Go to your Stripe Dashboard and make sure you're in sandbox mode (toggle in the top-right corner).
- Go to Developers > API keys and copy your Secret key (starts with
sk_test_). - In the Monetization Service, click Payment Provider in the left sidebar.
- Click Configure on the Stripe card.
- Enter a Name and paste your Stripe API Key, then click Save.
For production, prefer a Stripe restricted key (rk_live_*) over a secret
key. See
Using a Stripe restricted key
for the exact permissions to enable.
Always use your Stripe test key (sk_test_...) in the Working Copy
environment while following this guide. Stripe test keys run in a sandbox
environment where you can safely test subscriptions and payments without
processing real transactions. When you're ready for production, configure the
Production environment with a live key (sk_live_...). Do not replace a
test key with a live key in the same environment — use one key type per
environment.
Step 8: Add the monetization policy
The monetization policy checks entitlements and tracks usage on every request.
Add the policy to your routes
Click on the Code tab and select policies.json from the config directory.
- Click on Create Policy > Create Inbound Policy.
- Select the Monetization policy from the list of policies, and click Continue.

- In the Meters configuration field, set the key to
api_requestswith a value of1to match the meter you created in Step 4. This field maps the meter slug to the number of units each request consumes. - Click on Create Policy.
The Portal saves the policy to policies.json as a complete entry:
Code
Apply the policy to routes
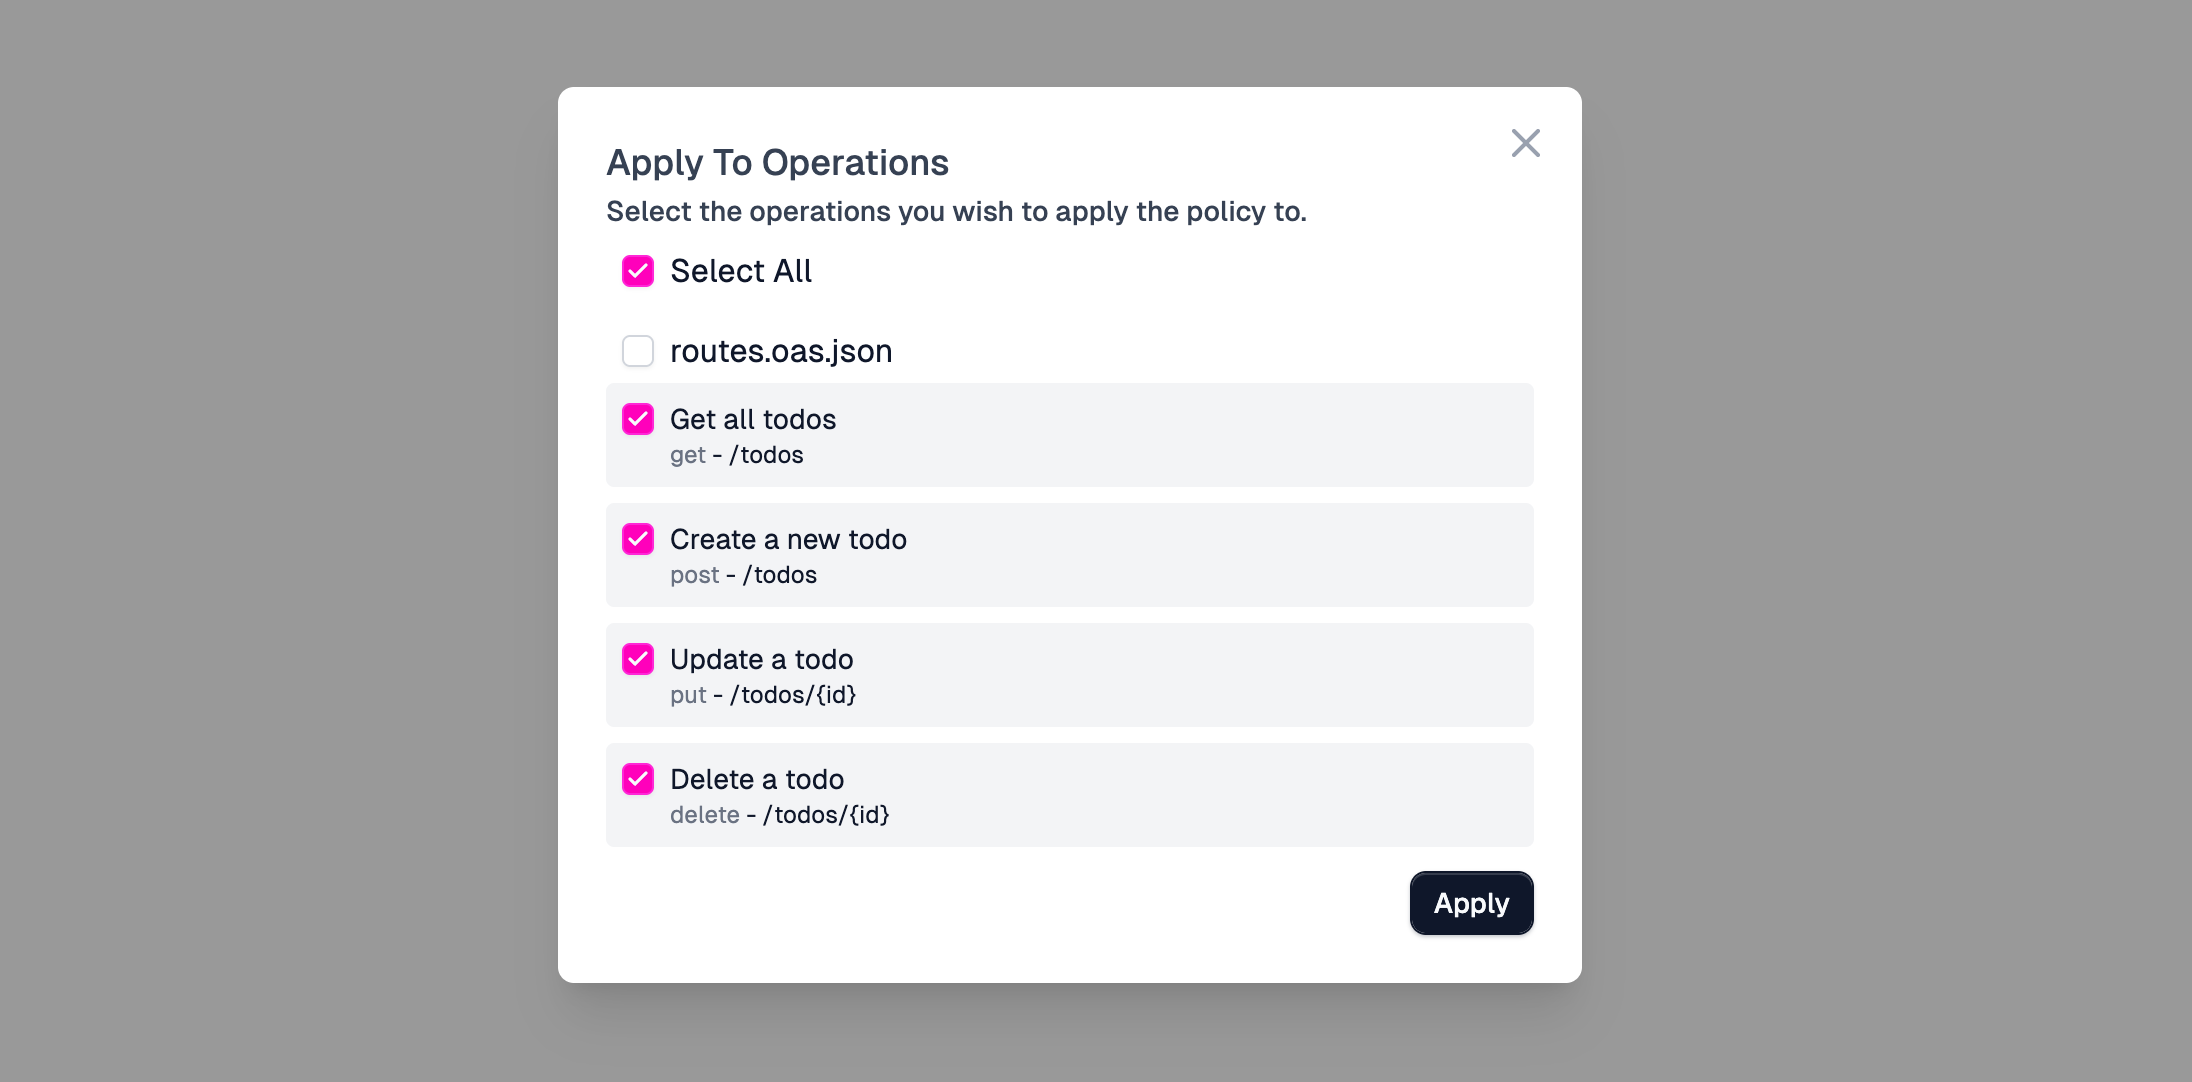
Next, you need to apply the Monetization policy to some or all of your routes.
- Click on the three-dot menu on the monetization-inbound policy.
- Select Apply Policy.
- Choose individual routes that you want to count towards the metered requests, or click Select All to add the policy to every route in the project.
- Click on Apply.
- Click on Save in your project to publish the changes
The MonetizationInboundPolicy handles API key authentication internally. You
do not need a separate API key authentication policy (api-key-inbound) on
monetized routes.
Step 9: Deploy and test
With the Monetization policy live on your API routes, you can now test the end-to-end flow.
Subscribe to a plan
- Open the Pricing tab in your Developer Portal (you can get the URL for this from the Deployment URLs dropdown in your project).
- Click Subscribe on one of the available plans.
- Enter payment information. Since you're using Stripe sandbox, use test card numbers — no real charges are made.
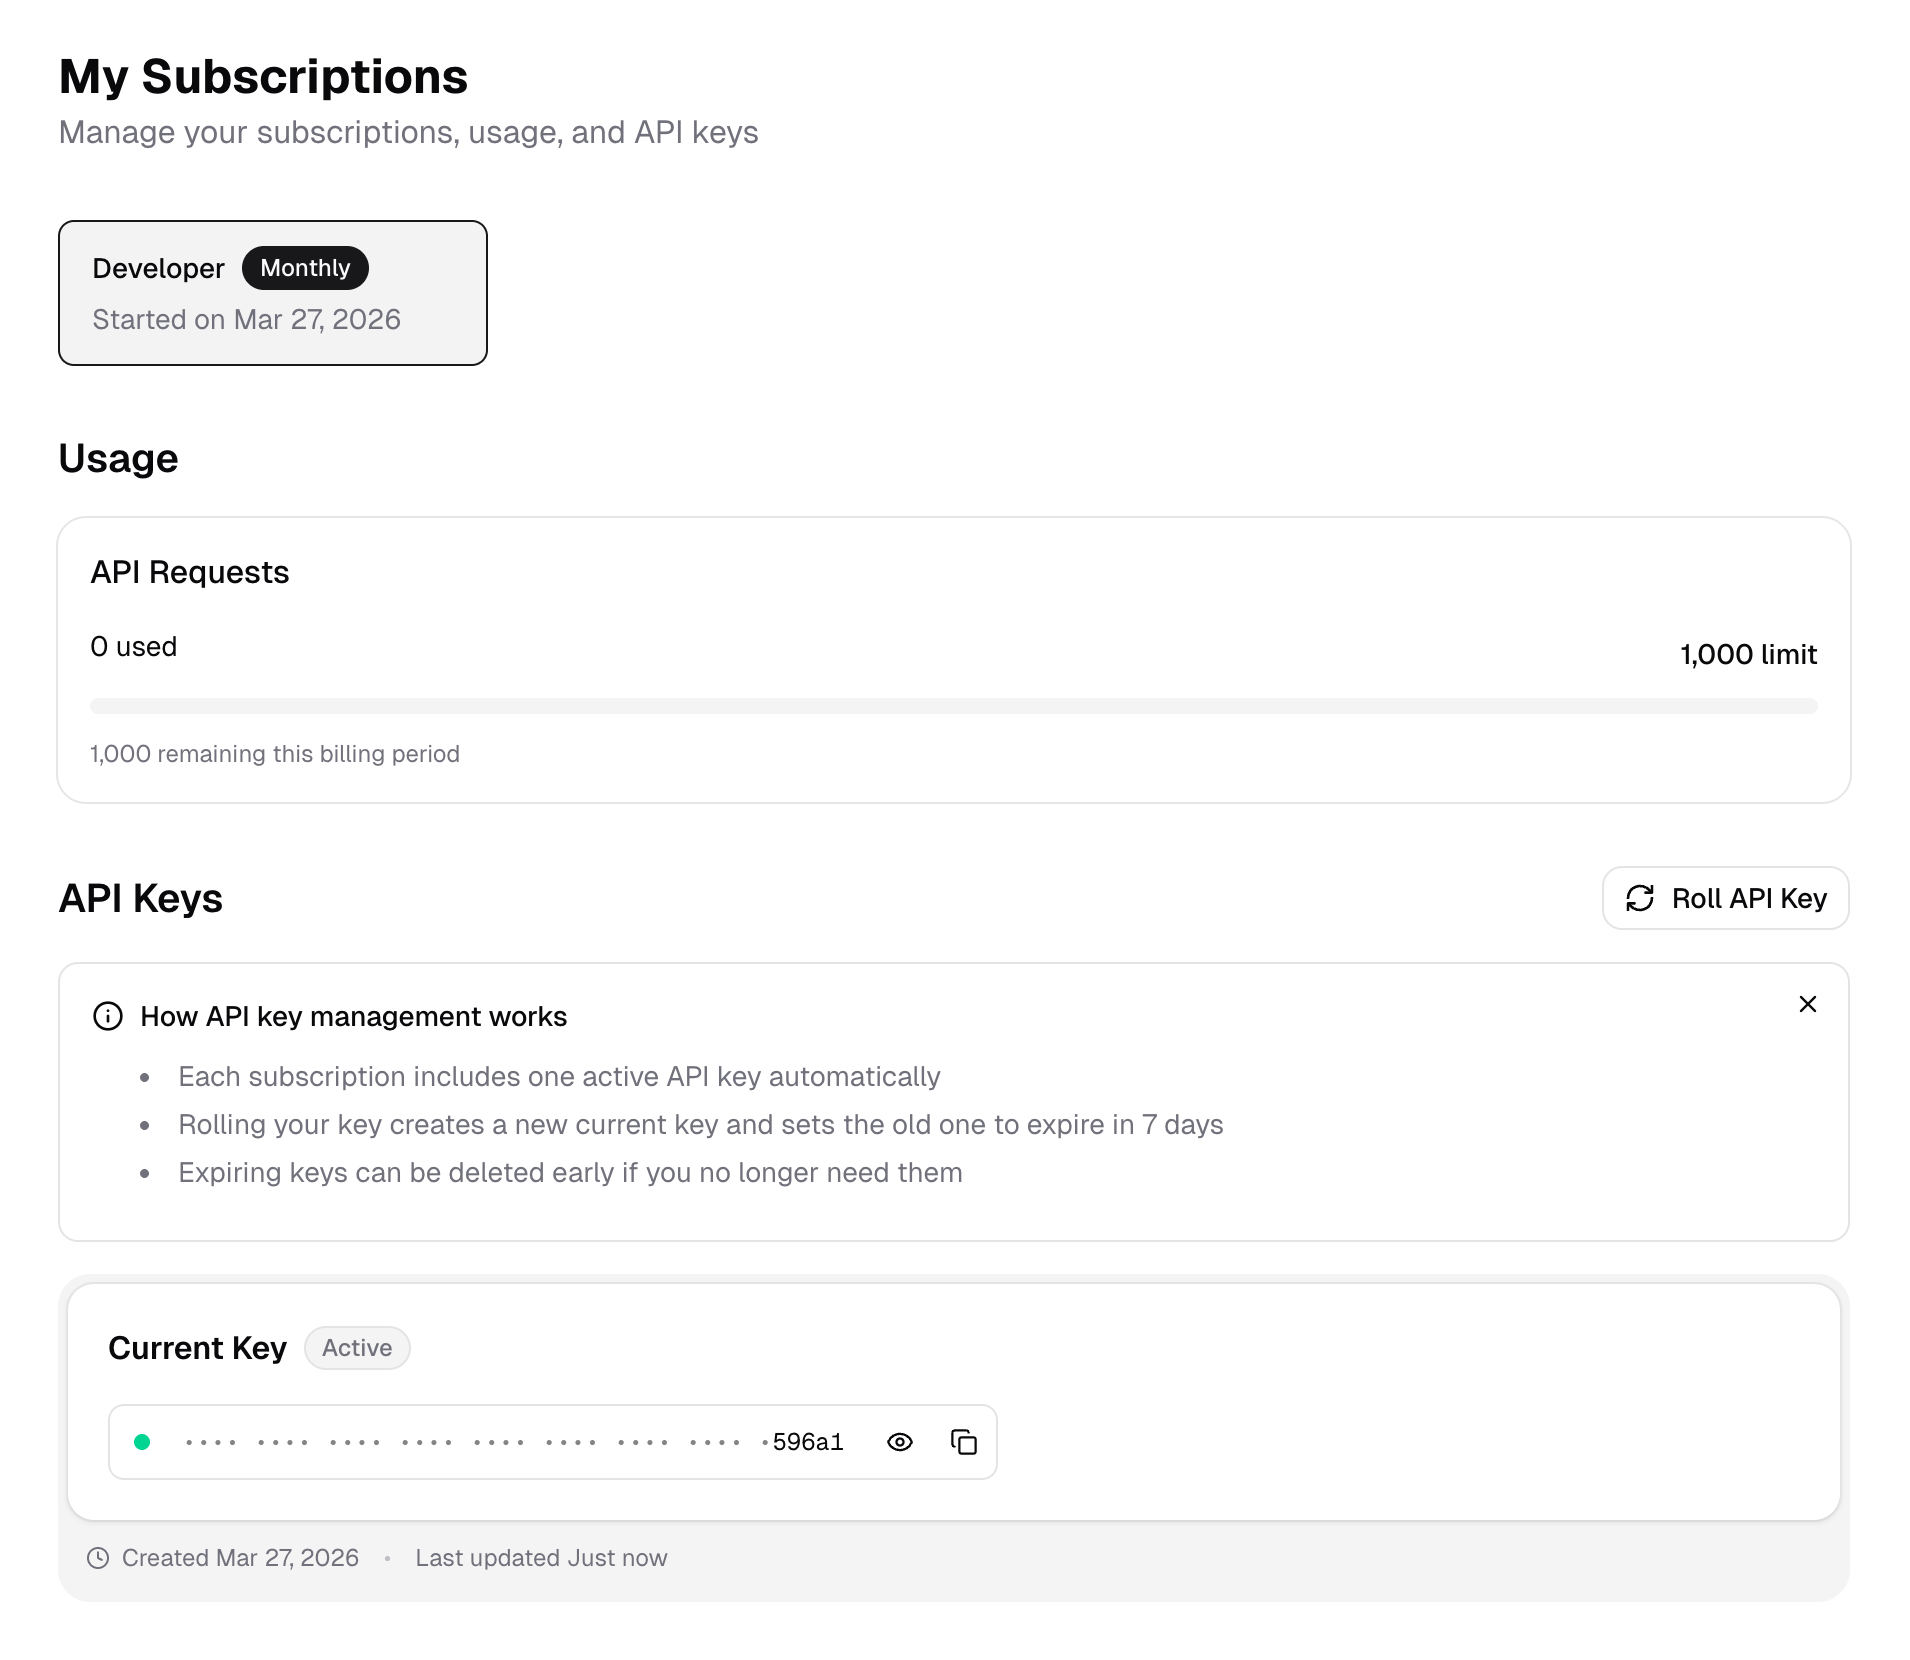
- After the subscription is confirmed, you can see your usage dashboard and API key.
Test: Make API calls
Copy the API key from your subscription and make requests:
Code
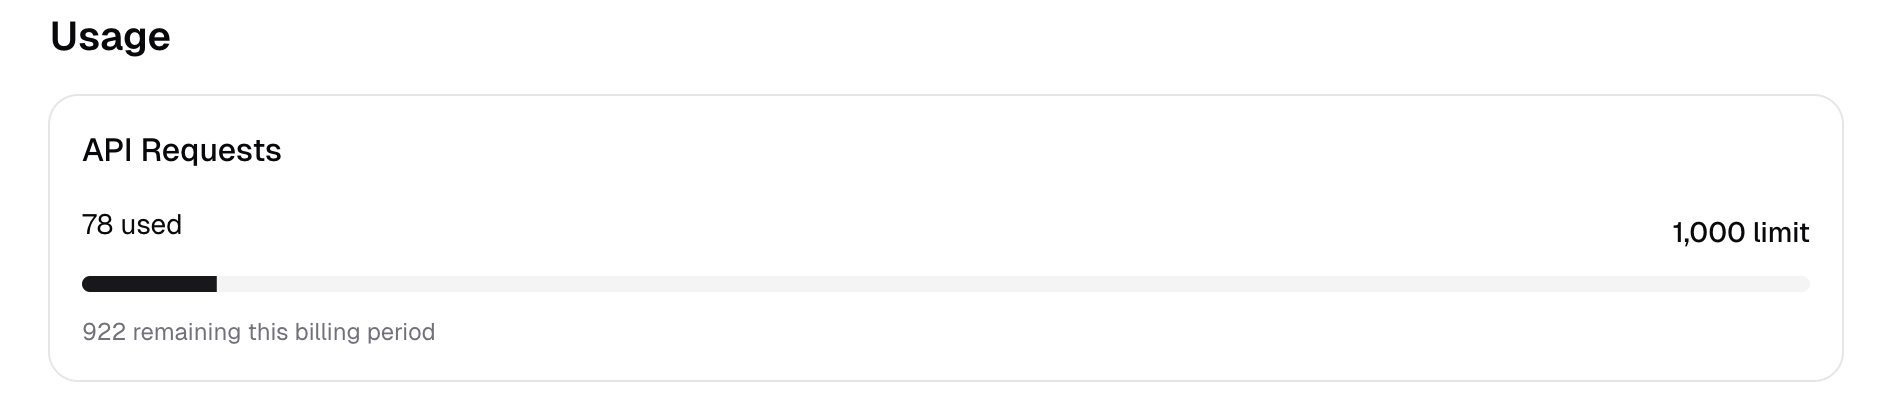
Head back to the Developer Portal to see your usage dashboard update with each
call. You should see the API Requests meter count increase toward your plan's
limit.
Next steps
Now you have run through the process of setting up Monetization on an example project, familiarize yourself with these other aspects and start integrating it into your own project.
- Billing Models — Choose the right pricing strategy
- Private Plans — Invite-only plans for specific users
- Tax Collection — Enable VAT, sales tax, or GST on invoices
- Monetization Policy Reference — Advanced policy configuration
- Subscription Lifecycle — Manage trials, upgrades, and cancellations